Bridge Fishing Drop Weight Calculator
Estimate sinker size for bridge fishing from deck height, target depth, tide speed, line diameter, bait drag, sinker style, and the line angle you want to hold.
📌Bridge presets
⚙Drop weight inputs
Bridge drop weight estimate
Calculation breakdown
🧰Drop weight hardware grid
Bank sinker
Pyramid
Torpedo
Claw weight
⚖Line and sinker comparison grid
Thin braid
0.19-0.36 mmLowest line drag and best depth control, but add abrasion leader near bridge structure.
Monofilament
0.33-0.56 mmMore stretch and diameter, so the same current usually asks for more drop weight.
Fluorocarbon
0.50 mmDense and abrasion resistant, but large diameters add noticeable drag in bridge tide.
Wire leader
0.65 mmUseful around toothy fish, yet it raises drag and tension on suspended bridge baits.
📊Current and depth starting weights
| Current speed | Typical vertical span | Suggested angle target | Starting drop weight | Bridge use case |
|---|---|---|---|---|
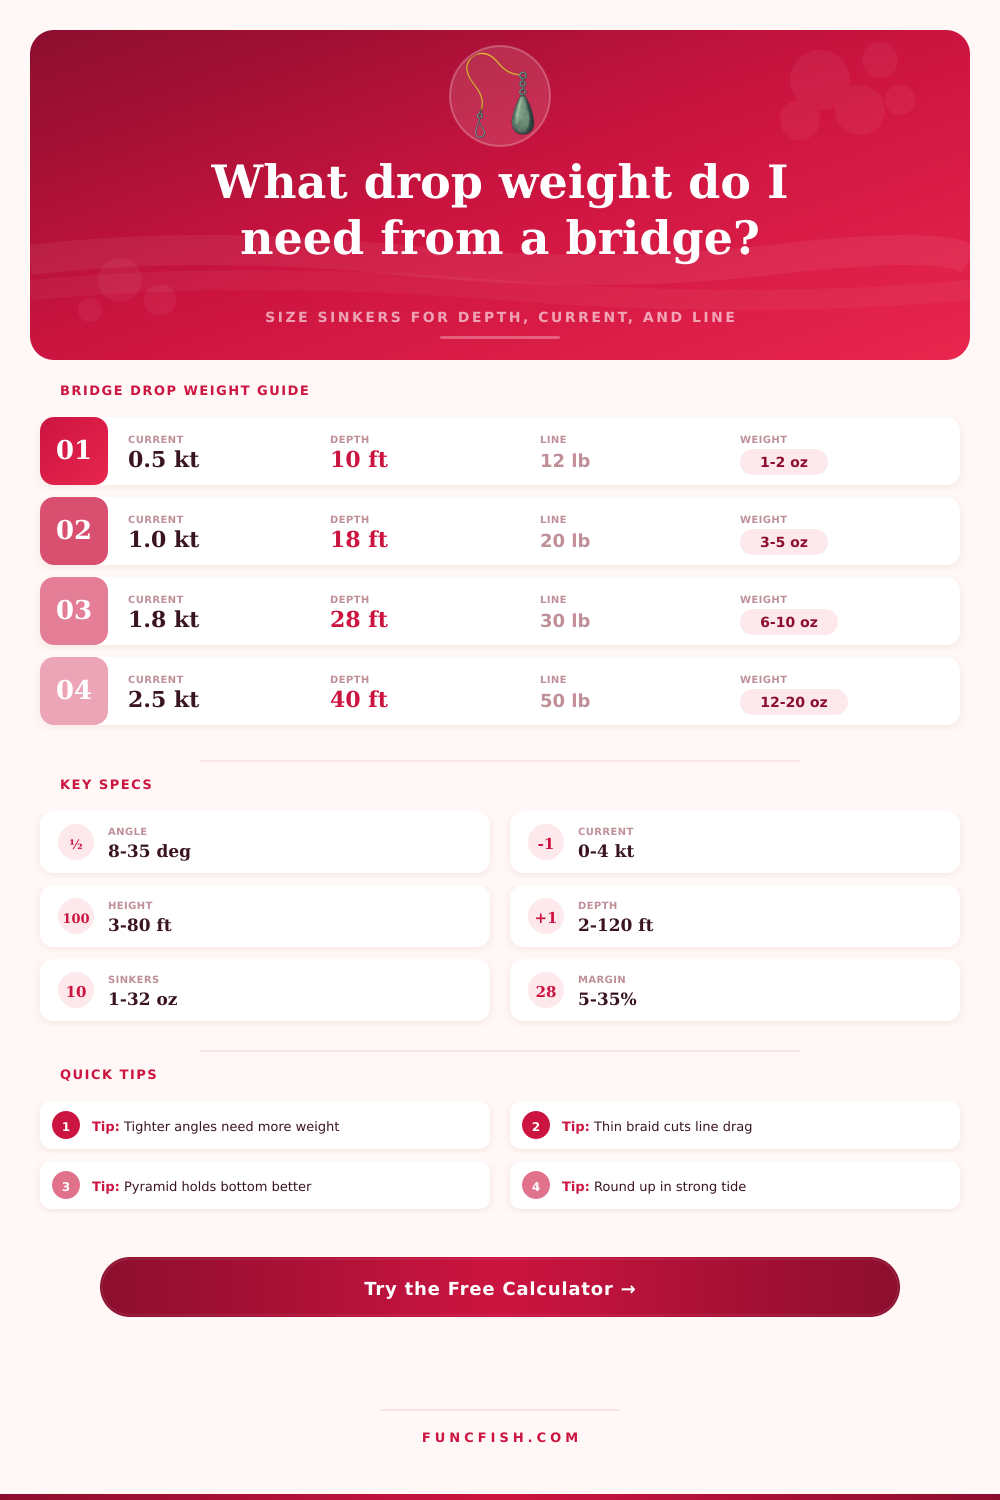
| 0.3-0.6 kt | 12-25 ft / 3.7-7.6 m | 12-18 deg | 1-3 oz / 28-85 g | Sabiki, shrimp bait, light piling drop |
| 0.7-1.2 kt | 20-40 ft / 6.1-12.2 m | 15-22 deg | 3-6 oz / 85-170 g | Snapper, flounder, small live bait |
| 1.3-1.9 kt | 25-55 ft / 7.6-16.8 m | 18-28 deg | 6-12 oz / 170-340 g | Striped bass, catfish, tautog footing |
| 2.0-2.8 kt | 35-75 ft / 10.7-22.9 m | 22-32 deg | 12-24 oz / 340-680 g | Inlet bridges, large baits, bottom hold |
| 2.9-4.0 kt | 45-100 ft / 13.7-30.5 m | 25-35 deg | 20-32 oz / 567-907 g | Heavy tide staging or short soak windows |
📏Line diameter drag reference
| Line class | Diameter | Relative drag | Bridge advantage | Calculation note |
|---|---|---|---|---|
| 15 lb braid | 0.19 mm / 0.007 in | Very low | Holds steep angle | Best when abrasion is controlled with leader |
| 30 lb braid | 0.28 mm / 0.011 in | Low | Good all-around bridge line | Often cuts 15-30% weight versus mono |
| 20 lb mono | 0.45 mm / 0.018 in | Medium | Forgiving stretch | Use more margin in faster tide |
| 30 lb mono | 0.56 mm / 0.022 in | High | Better handling | Line belly grows quickly with height |
| 60 lb wire | 0.65 mm / 0.026 in | Very high | Toothy fish leaders | Keep wire sections short when possible |
🐟Bridge species and rig grid
| Target | Common bridge zone | Line range | Drop weight range | Drag profile |
|---|---|---|---|---|
| Sheepshead | Pilings, 8-25 ft / 2.4-7.6 m | 20-30 lb braid | 1-5 oz / 28-142 g | Shrimp or crab, compact bait |
| Flounder | Channel edge, 10-35 ft / 3-10.7 m | 15-30 lb braid | 2-8 oz / 57-227 g | Strip bait or minnow |
| Mangrove snapper | Current seam, 12-40 ft / 3.7-12.2 m | 20-40 lb braid | 3-10 oz / 85-283 g | Small live bait |
| Striped bass | Tide line, 20-60 ft / 6.1-18.3 m | 30-50 lb braid | 6-16 oz / 170-454 g | Live bait with higher drag |
| Catfish | River bottom, 15-50 ft / 4.6-15.2 m | 20-50 lb mono | 4-16 oz / 113-454 g | Cut bait, bottom contact |
| Tarpon bait | Shadow line, 15-60 ft / 4.6-18.3 m | 50 lb braid plus leader | 8-24 oz / 227-680 g | Large live bait, suspended |
🔧Sinker style coefficients
| Style | Drag coefficient | Bottom hold factor | Best calculation use | Equivalent note |
|---|---|---|---|---|
| Torpedo | 0.72 | 0.90 | Fast vertical drops | Needs less weight in suspension |
| Bank | 0.92 | 1.00 | General bridge rigs | Neutral reference style |
| Pyramid | 1.06 | 1.22 | Sand or mud bottom | Higher drag, stronger hold |
| Coin flat | 1.12 | 1.16 | Slow roll or low snag bottom | Resists sliding better than bank |
| Storm claw | 1.18 | 1.35 | Heavy inlet tide | Holds with more water resistance |
💡Calculation tips
Angle control: When fishing from a bridge, the deck height counts as part of the vertical span. A 20 ft bridge plus a 20 ft target depth behaves like a 40 ft vertical drop for line-out and swing calculations.
Rounding weights: The calculator rounds up to common sinker sizes because small changes in tide speed create large drag changes. Recalculate when the current doubles or your bait profile changes.
You aren’t just fighting the fish; you’re fighting physics standing on a bridge deck. The current grab ahold of your rig with violence as it hit the water’s surface. From up there, everything appear calm. This is where most newcomers go wrong. They think the key to weighting is depth. Truth is, your bait’s drag and its line angle matter more.
Your goal is to keep your bait in the strike zone with enough weight. But don’t anchor yourself so hard that you lose feel. That’s where the calculator (above) come into play. It takes the water flow math out of balancing these forces.
How to Pick the Right Weight for Bridge Fishing
That’s where it gets confusing, because they’re talking about the depth. But it isn’t simply the depth of the area. They are also referring to distance from the rail on the bridge down to the water’s surface. So if you were fishing a pier twenty-feet tall into twenty feet of water, your total length is now forty feet. That’s a heckuva lot different angle and it take a much larger weight to combat the sideways force created by the tide.
The closer you are to structure, the tighter that angle becomes. And the sinker size has to get much bigger as you try to stay close to the structure. This combines the length factor into the tool. Instead of blindly guessing based off depth, it provide a realistic calculation.
That last one depends heavily on line selection. Consider diameter or line profile. Braid is slick and thin, cutting through the water with very little effort. Mono is thick and will act as a mini parachute in heavy current. Go from braid to mono and you’ll probably should of upsize your weight to maintain your positioning. That’s to maintain your positioning.
Somewhere between braid and mono sits fluorocarbon. It’s broad and has some density too. The calculator account for this automatically. It knows thirty-pound test mono will cause more drag than thirty-pound test braid. They’re both equal breaking strength but that makes a big difference when you’ve got a bait suspended over snapper.
But the sinker’s shape can be important too. Streamlined weights like torpedoes fall quickly. But they have virtually no bottom-holding power. Like a puck on ice, they slide around. Pyramid or storm claw sinkers digs into the bottom. They create drag and are stable. At the expense of sinking speed, they hold their spot. That’s why the coefficients on the page break out the hardware grid. If you want depth fast in slow water, pick the torpedo. When the tide rips through an inlet, go with the claw. Speed or anchor, that’s the question.
Then there’s the bait factor. The smaller the shrimp hook, the tinier the presentation. You can hang a big rig out with lots of float. This catches a lot more water than a live bait setup on a small shrimp hook. That extra pull drags your line further from vertical position. It creates more tension. This shifts the perceived depth. This is all based off ignoring how your bait is going to ride through the water. The tool take it into account because you can choose different drag profiles that takes it into account. So instead of just weighing down a hook, it makes sure you are accounting for the whole system that you put out.
Give yourself a little buffer. The tides shift quickly. Something that’s perfect at prime slack may be useless once there’s some flow. Fifteen percent is usually a good number to add on. That gives your rig plenty of ballast without going too far. You need it to grip enough to prevent movement, but not so much as to overpower it and prevent feeling the small bites or fighting drag during a hookset. Insurance meets precision.
It’s about managing the variables you can’t always see. Structure on the bottom matter. The exact rate of flow matters. Water temp matters. Each variable is different in a bay or river. Structure on the bottom matters. The precise rate of flow matters. Water temp matters. Each variable are different in a bay or river. No equation will capture all the details of a live bay or river. But if you get the variables down you at least put yourself in position.
Establish a starting point. And then learn how to tweak it based off your experiences as the conditions change. It isn’t perfect; rather it’s consistent. That’s what you’re looking for, consistent placement of your bait in contact with the fish and staying there holding your ground against the current. That transforms an angler from frustration to full cooler status. It goes from chaos to control.