Rod Guide Spacing by Blank Length Calculator
Build a guide spacing map from blank length, rod style, action, guide count, tip gap, reel position, line type, and static-load preference.
📌Rod spacing presets
⚙Blank and guide train settings
Measure finished blank length from tip top shoulder to butt end.
Use the recommendation card to adjust before wrapping.
Guide spacing results
Calculation breakdown
📏Calculated guide position map
| Guide | Distance from tip | Distance from butt | Interval from prior point | Build note |
|---|---|---|---|---|
| Tip top | 0.0 in | 84.0 in | Start | Run the calculator for spacing |
Positions are layout marks for test wrapping. Final guide movement should follow a loaded static test and line path check.
🎣Guide train comparison grid
Spinning
Casting
Fly
Surf
📊Blank length guide count reference
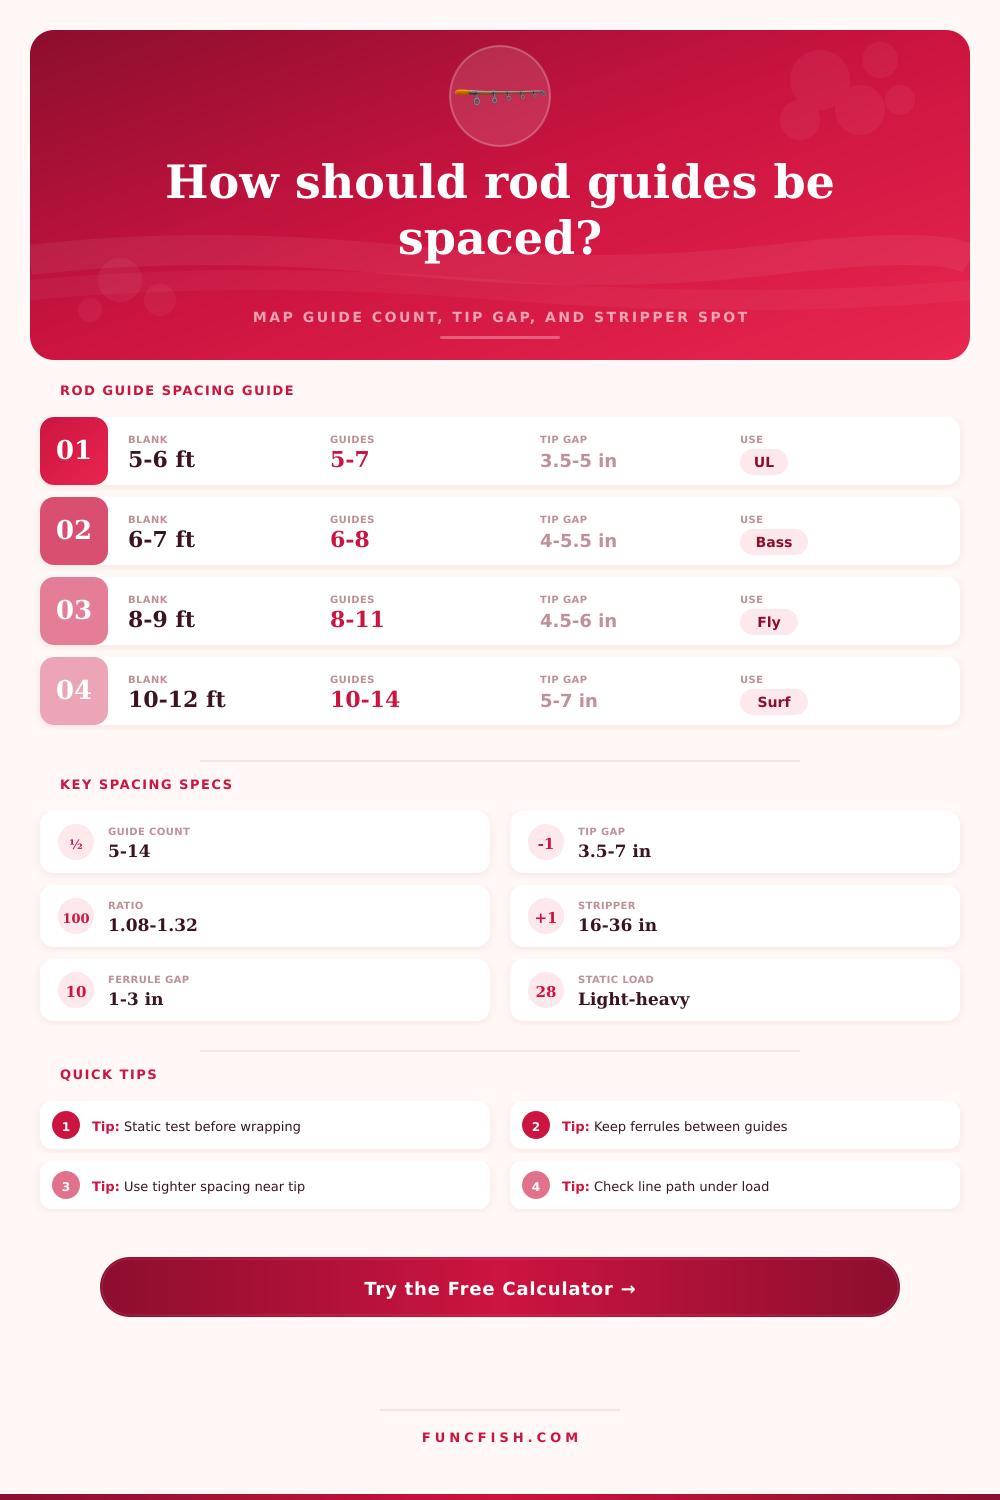
| Blank length | Spinning guides | Casting guides | Fly guides | Starting tip gap |
|---|---|---|---|---|
| 5 ft to 5 ft 6 in | 5-6 plus tip | 6-7 plus tip | Not common | 3.5-4.5 in |
| 6 ft to 6 ft 6 in | 6-7 plus tip | 7-8 plus tip | 7-8 plus tip | 4-5 in |
| 7 ft to 7 ft 6 in | 7-9 plus tip | 8-10 plus tip | 8-9 plus tip | 4.25-5.25 in |
| 8 ft to 9 ft | 9-11 plus tip | 10-12 plus tip | 9-11 plus tip | 4.5-6 in |
| 10 ft to 12 ft surf | 10-14 plus tip | Rare build | Not common | 5-7 in |
🔧Spacing behavior by action and line
| Build condition | Spacing effect | Guide count effect | Best check |
|---|---|---|---|
| Extra-fast graphite tip | Tighter top three intervals | Often add one small guide | Line must not touch blank |
| Moderate glass or composite | Smoother interval growth | Standard count usually works | Check mid-blank bend |
| Braid with leader knot | Slightly larger reduction path | May need larger choke guide | Cast leader knot through train |
| Heavy drag boat rod | Tighten loaded upper half | Add one guide if line angles hard | Static load at drag setting |
| Long surf blank | Open butt spacing carefully | Count depends on reduction train | Test cast plus load check |
📋Rod style starting dimensions
| Rod style | Reel center from butt | Reel to stripper | Progression ratio | Layout note |
|---|---|---|---|---|
| Finesse spinning | 9-11 in | 17-22 in | 1.14-1.20 | Small ring reduction train |
| Bass casting | 9-11 in | 15-19 in | 1.09-1.16 | Low line path over blank |
| Fly rod | 3.5-5 in | 26-34 in | 1.10-1.18 | Stripper measured from grip area |
| Surf spinning | 26-32 in | 28-40 in | 1.20-1.32 | High frame stripper guide |
| Trolling rod | 13-17 in | 15-22 in | 1.08-1.14 | Load path is more important |
💡Spacing calculation tips
Static-load tip: Tape guides on the marks, run line through the reel and tip, then bend the blank under expected drag. Move any guide that creates a sharp line angle, especially across the upper third.
Ferrule tip: On multi-piece blanks, keep guide feet outside the ferrule clearance zone when possible. A small shift is better than wrapping directly over a joint stress area.
For most rod builders, the blank comes first and then we see the void in-between the guides. And it might feel intuitive enough. You place one on top and one by your reel; its easy, right? Wrong! The middle section call for careful calculations. It’s not necessarily an art, although many view it as such. Instead, it’s just math.
Spacing can be critical. Poor angles will hurt guide integrity, reduce sensitivity and make casting harder. Think about pulling hard on a big fish with an end of a plastic guide ring at an acute angle… How does that hold up?
Why Guide Spacing Matters
This takes all the guesswork out. Just enter in your blank size and it spits back accurate map. No more wondering if nine guides is just right for a six-foot rod or if eight are too many for a seven-foot one. It will account for power, action, line type and other things that modify the demands of the rod. For example, a slow glass rod will bend one way, but a fast action graphite blank will bend another. This means the guides should be spaced differant to match the shape.
The closer together you space them on a stiff tipped rod, the less it will bend as a unit when loaded vs. It is supported from the butt to the tip by the next guide down. This changing bend is something most don’t consider when simply viewing still shape of a rod.
One example is the tip gap, which is the space between the top of the rod and the first guide. You may not think it matters much, and in pictures it doesn’t look like much. However, it does affect how your lure come off the rod and the tip action during a fish bite. For instance, a smaller gap makes for a more responsive rod (good for finesse), whereas a larger gap will help cast heavy lures with less “stickiness” (better for big baits).
Because of this, the tool can be used to pick the style or species you want. Even though two different rods may be 7 feet long, a surf rod has a very different set of physics from a bass rod. They tend to be tight ratioed towards the butt so they can take huge drag loads without line digging into the blank.
Another important variable is the position of the stripper guide, which establishes the starting point of the line off the spool and sits close to the reel. Too far forward and you get a poor loop cast or maybe even hit the reel foot. Too far back and you don’t get as much casting distance or sensitivity due to losing some line between the butt and the stripper guide. Based off where you mount your reel, the calculator will map that into the equation so your line come off clean from the tip all the way to the handle. The default positions is what has been proven to work well for most casting and spinning setups. But if you have an unusual reel seat, there’s a place to adjust the offset.
Often overlooked: Ferrule placement. You wrap your rod and notice a foot from one guide is right on top of a joint, which is a weak spot where the rod may snap under load. You wrap your rod and notice a foot from one guide right on top of a joint; a stress concentration point where the rod may snap under load. A simple rule for keeping guides away from ferrules will save you from any structural failures down the road. With the tool’s clearance zone input, you can make notes of those no-wrap zones before using the epoxy. It forces you to consider not only how the lines look but also how strong they is.
Tape out the layup before wrapping the last guides. We like numbers. Planning is good. But there’s no substitute for reality, such as friction and weight. Simulate a fish fighting on the line by bending the blank while it holds a static load. Where does the line contact the blank? Is it digging in? Move that guide an inch toward the butt or tip to make the curve less sharp. A small change makes a big difference in how the rod performs.
The calculator provides starting point. It is not the end all. That’s what your hands and eyes do. There’s a fine balance between form and function when building rods. Pretty guide trains won’t do you any good if the guides wears out fast or if the line doesn’t shed well. Get as close as you can with the tool and then make some adjustments based on real world use.
The rod needs to be second nature. It should of not be an obstacle course for your line. If the guide spacing is dialed in properly, you don’t even think about it anymore; you simply go catch fish.