Bulk Shot to Dropper Ratio Calculator
Convert a float's carrying capacity into a practical bulk shot, dropper shot, spacing, and trim plan for pole, waggler, stick float, slider, and running-line rigs.
🎯Real Shotting Presets
⚙Rig Inputs
Bulk Shotting Plan
Full Calculation Breakdown
📊Shot Size Data Grid
Micro Droppers
Fine Droppers
Bulk Builders
Large Loads
📏Bulk Ratio Reference Table
| Rig style | Typical bulk share | Dropper share | Best use | Fall behavior |
|---|---|---|---|---|
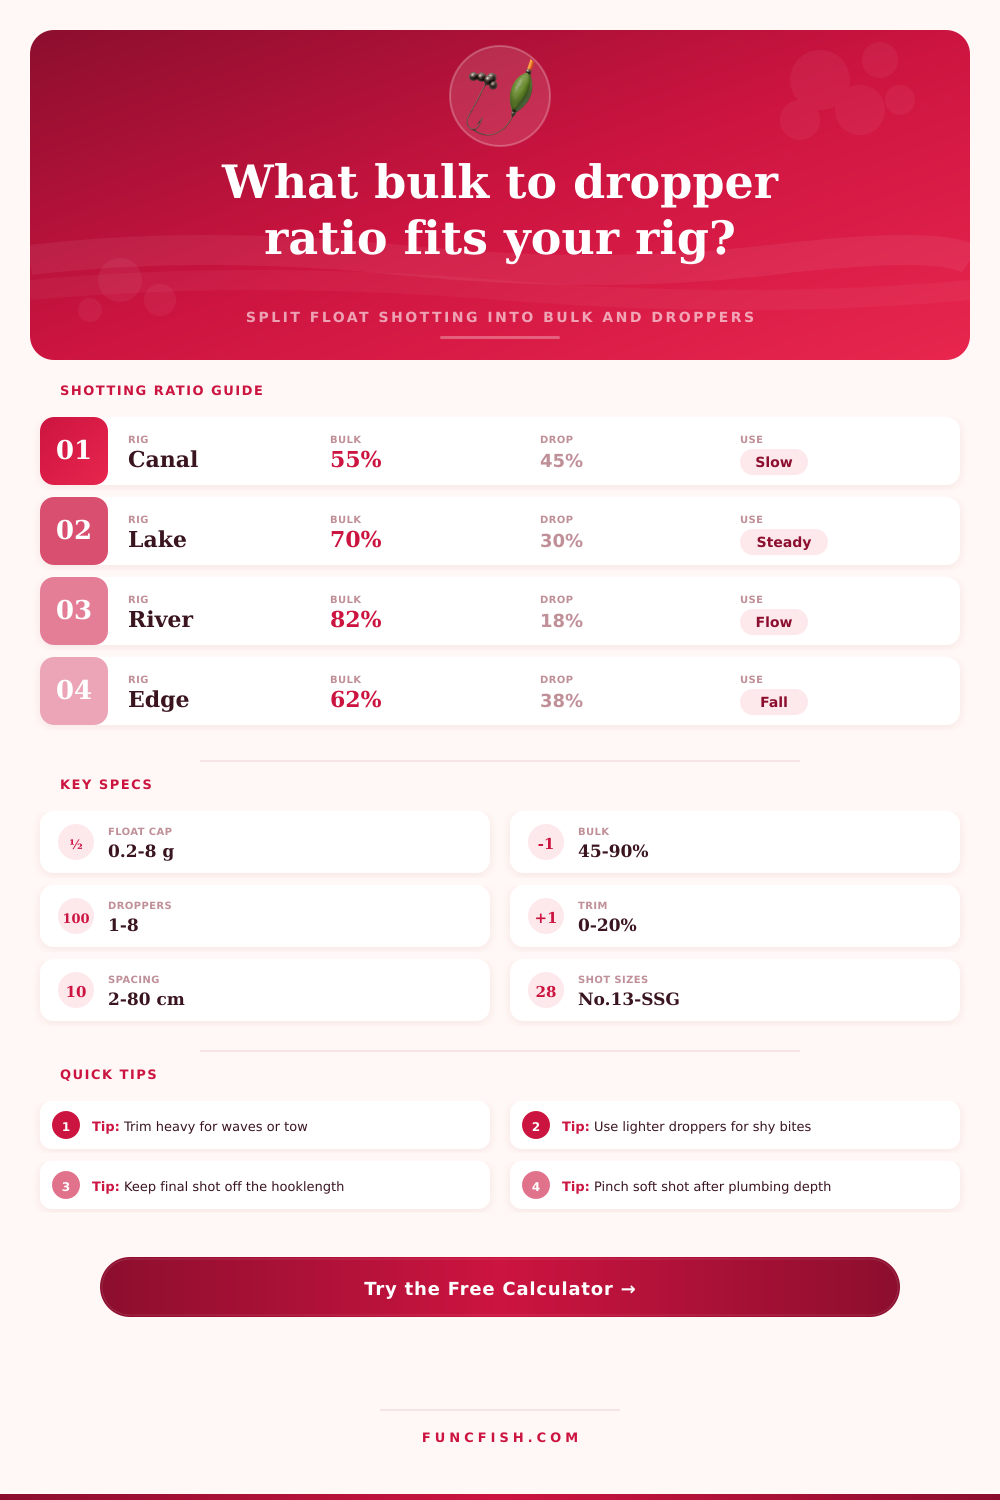
| Winter canal pole | 50% to 60% | 40% to 50% | Roach, perch, skimmers | Slow, readable fall |
| Commercial pellet pole | 65% to 75% | 25% to 35% | F1s, carp, bream | Balanced fall and stability |
| Deep waggler | 75% to 85% | 15% to 25% | Deep lakes and reservoirs | Fast depth control |
| River stick float | 78% to 88% | 12% to 22% | Dace, chub, roach | Quick set in flow |
| Lift-bite tench rig | 55% to 65% | 35% to 45% | Tench and crucians | Positive lift indication |
🐟Species and Rig Matching Grid
Roach / Dace
55:45Use three to six fine droppers when bites show during the last third of the fall.
F1 / Skimmer
70:30A medium bulk with two or three droppers suits pellets, maggots, and light tow.
Chub / Barbel
84:16Keep the bulk compact so the bait reaches depth before the float races ahead.
Tench / Crucian
60:40A heavy lower dropper can exaggerate lift bites while keeping the float dotted down.
📋Shot Material Comparison
| Material choice | Calculator factor | Best role | Practical effect | When to adjust |
|---|---|---|---|---|
| Soft lead split shot | 1.00 | General bulk and droppers | Predictable size-to-weight match | Use marked shot weights directly |
| Non-toxic alloy shot | 1.08 | Waters requiring non-lead shot | Slightly bulkier for the same load | Add one fine trimmer if float sits high |
| Pole styl weights | 0.98 | Fine rigs and tidy line grip | Clean alignment on light line | Check sliding after plumbing |
| Inline olivette | 0.96 | Compact deep-water bulk | Less hinge effect than many shot | Lock with tiny shot above and below |
| Tungsten putty trim | 0.90 | Final antenna trimming | Small volume with high density | Use for the last few hundredths of a gram |
| Micro shot spread | 1.02 | Shirt-button patterns | More pieces, slower presentation | Reduce bulk share in shallow water |
📐Dropper Spacing Reference
| Bulk-to-hook distance | 2 droppers | 3 droppers | 4 droppers | Recommended use |
|---|---|---|---|---|
| 20 cm / 8 in | 7 cm | 5 cm | 4 cm | Shallow punch or pellet rigs |
| 40 cm / 16 in | 13 cm | 10 cm | 8 cm | Canal and short pole rigs |
| 60 cm / 24 in | 20 cm | 15 cm | 12 cm | General stillwater pole rigs |
| 90 cm / 35 in | 30 cm | 23 cm | 18 cm | Waggler or long-line work |
| 120 cm / 47 in | 40 cm | 30 cm | 24 cm | Deep slider and reservoir rigs |
🧭Calculation Tips
Ratio check: If the calculator recommends more than half the load as droppers, the rig will fall naturally but may take too long to settle in depth or flow. Raise the bulk share before changing float size.
Shot rounding: Real shot varies by maker and wear, so the nearest-shot plan is a starting point. Cock the float in the margin and use trim putty or one micro shot to finish the antenna height.
It sinks like a rock, not drifts like real food. The float rides high in the water. You see those fish shadows and they won’t take the bait. Rarely is it because you didn’t cast well enough or use wrong bait. The issue is one of weight distribution down the line.
Forget about light vs. Heavy weight as if there were only two choice. Concentrate on a specific ratio of dropper to bulk shot. To most anglers, filling up your float until antenna is barely out of water is job one. Next comes topping it off with whatever shot you have handy around top. You end up with a solid column of lead that use heavy weight to force the bait into fish.
How to Balance Your Fishing Rig
That’s where things get interesting because the art of it all is dividing entire load-bearing capacity into two separate duties. The bulk shot gets rig down deep as fast as possible. The dropper(s) manages the rest of descent and position the hookbait carefuly and precisely. Once you know how deep you plan to fish it and what that float can hold, plug those numbers into the calculator above and it’ll do the math for you. But understanding what those numbers mean lets you find the right formula without doing the math and helps you fish better, than usual.
For instance, what’s the bulk percentage? Do you want that number higher or lower? Well if you’re fishing some slow canal with roach taking bait slowly as they drift to bottom, then you want that number lower. So maybe like fifty or sixty is low enough, leaving more weight below hook for slower sinking droppers that slow the rest of terminal tackle down just enough to get a follow bite.
On the other hand, if you’re fishing a faster flowing river, you really want that number high. You want it north of eighty percent so the float doesn’t race off before bait hits bottom.
The other variable is material. Because tungsten is denser than lead, you can have same weight on a smaller diameter. This drastically cuts down on water resistance. It also help the rig sink quicker without adding more material, which would make line stiffer. The non-toxic alloys are a little bigger for same weight. So there may be a need for another small dropper to fine-tune presentation even more. It is not a big deal, but if fish are being finicky and you’re fishing in heavy chop or stained water, it matters.
Theory becomes practice on the other end of your line… Spacing.
It doesn’t do any good to stack five droppers in a two-inch hole and assume they’ll have independent action. Every dropper should of been given the space to create its own resistance zone. If you spread three droppers evenly over fifty centimeters above hook, they creates clearly defined stages for the fall. First dropper slows it down, next one steadies the bait and finally the third offers the ultimate tender touch. Packed together, their influence is just a wad of resistance, that defeats the purpose of different size selection altogether.
The last tweak for getting a rig that works into one that really works is trimming. You want enough trim so it is not buried. You also need a bit of leeway so it still floats right on top when you get some surface wind or tow pressure. When it’s perfect at sitting flush with no air space at all in calm water, any flow of water take it totally under. It hides the bites. The tiny bit extra is a cushion to those variables that are always changing every minute on the bank.
So finally shooting is all about energy management. Having too much up on top slows down rig and is apparent. Not having enough sends it drifting away with no direction. It’s a matter of finding the balance between the two and you can’t guess your way there with weights alone, only try different ratios. Use your calculated split, dampen the material, and adjust the spacing until the fall looks right. The fish will tell you when you’ve got it. And they usually do it while bait is still falling by knocking the float.