Vertical Jigging Line Angle Calculator
Estimate the angle between your jigging line and true vertical using depth, line out, jig weight, line diameter, leader drag, current, boat drift, and rod-tip height.
📌Scenario presets
⚙Jigging angle inputs
Vertical jigging line-angle results
Your estimated line angle and jig offset will appear here.
Calculation breakdown
🧵Line drag reference
10 lb thin braid
30 lb jigging braid
80 lb offshore braid
20 lb monofilament
📊Angle interpretation
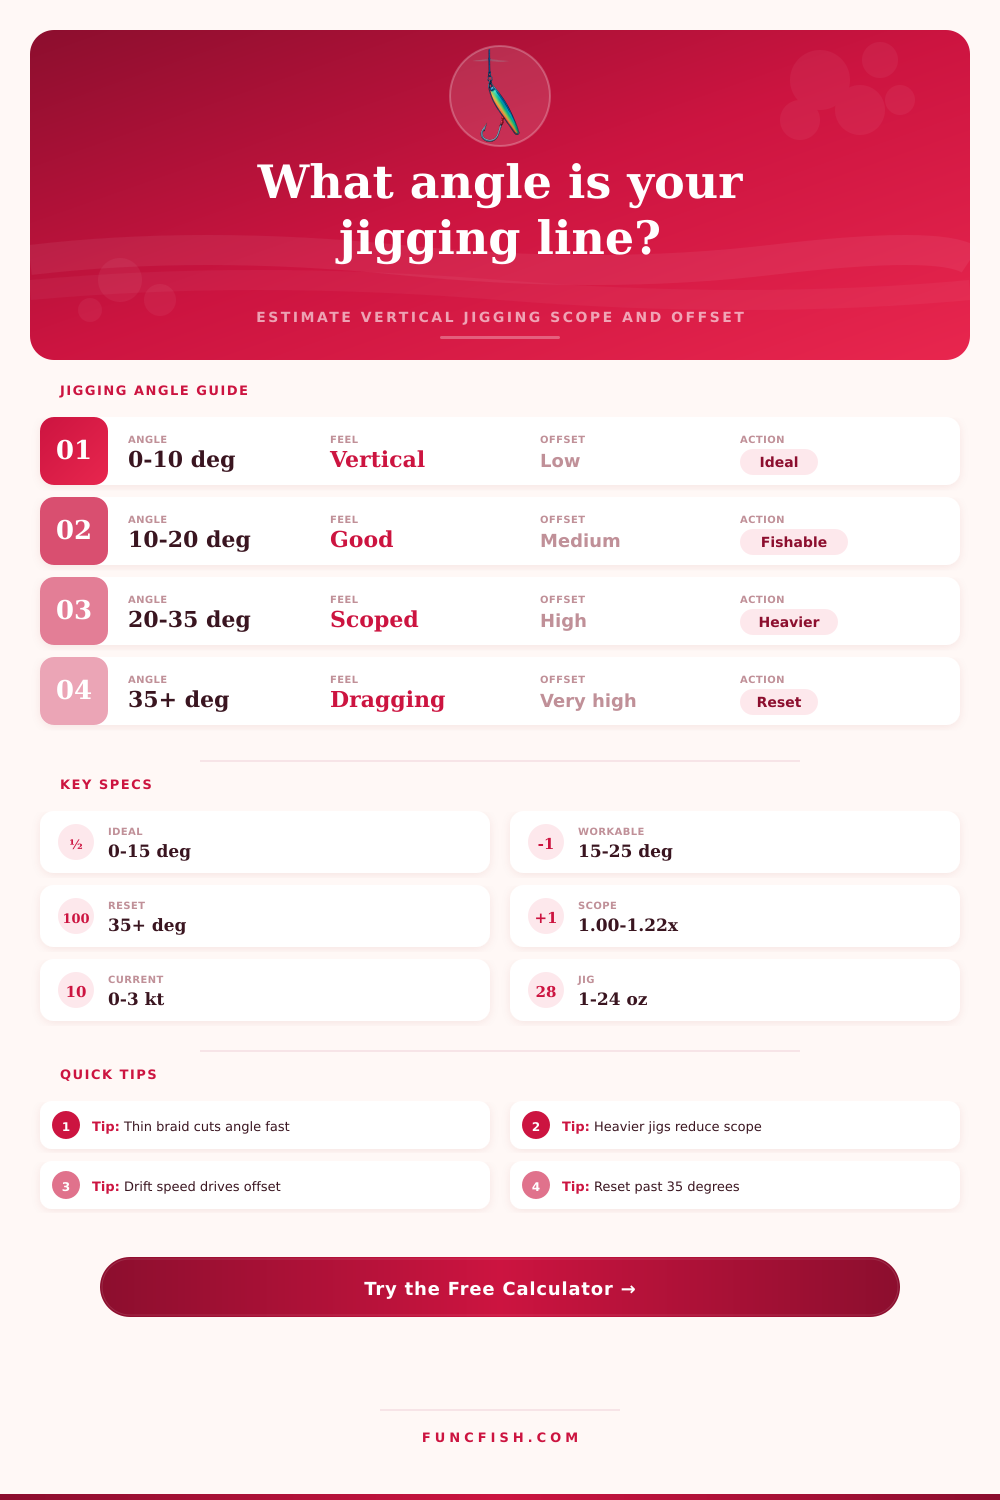
0 to 10 degrees
VerticalExcellent for precise bottom ticks, ice fishing, and deep marks where the jig should stay close to the transducer cone.
10 to 20 degrees
FishableCommon boat drift angle. Jig action is still clean, but bottom contact and sonar target alignment need watching.
20 to 35 degrees
ScopedUse a heavier or slimmer jig, thinner braid, a drift sock, or short resets to keep the lure in the zone.
Over 35 degrees
ResetPresentation starts dragging instead of jigging. Reel up and drop again, reposition, or increase weight.
📐Jig weight and scope guide
| Depth range | Light current | Moderate current | Strong current | Line note |
|---|---|---|---|---|
| 20-50 ft / 6-15 m | 0.5-1.5 oz / 15-45 g | 1.5-3 oz / 45-85 g | 3-5 oz / 85-140 g | 10-20 lb braid keeps feel crisp |
| 50-120 ft / 15-37 m | 1.5-3 oz / 45-85 g | 3-6 oz / 85-170 g | 6-10 oz / 170-285 g | 20-40 lb braid balances drag and strength |
| 120-250 ft / 37-76 m | 4-8 oz / 115-225 g | 8-14 oz / 225-400 g | 14-20 oz / 400-565 g | Thin 30-50 lb braid helps deep drops |
| 250-500 ft / 76-152 m | 10-16 oz / 285-455 g | 16-28 oz / 455-795 g | 28+ oz / 795+ g | Use slim jigs and reduce leader drag |
🐟Technique reference
| Technique | Preferred angle | Jig profile | Line choice | Correction |
|---|---|---|---|---|
| Ice jigging | 0-8 degrees | Compact spoon or minnow | Thin braid or fluoro | Move hole or lighten action |
| Walleye snap jigging | 5-18 degrees | Blade bait, jig head, spoon | 10-20 lb braid | Control drift with bow mount |
| Slow pitch jigging | 8-22 degrees | Center-balanced metal jig | 20-50 lb braid | Use heavier grams by depth |
| Deep cod or halibut | 10-25 degrees | Slim heavy metal jig | 50-80 lb braid | Shorten leader and reset often |
| Tuna speed jigging | 5-20 degrees | Knife jig | 50-100 lb braid | Chase drift line with boat |
✅Practical angle checks
If line out is much longer than depth plus rod-tip height, the extra scope must appear as horizontal offset. This is the quickest field check.
Current, drift, line diameter, leader thickness, and jig shape can create angle even when line-out measurements look tidy.
So you drop down a jig in deep water, let it touch the bottom and now on sonar you see the fish is still ten feet off the structure. Reel up just an inch or two and you expect to feel something. Nothing. You feel some weight on the line but it’s not where you thought the lure should of be. That’s because when there is a current or drift, vertical jigging is rarely truly vertical. The bait angle out. It pulls away from the transducer cone where you want it to work and what you are trying to cover. Knowing that angle is the difference between fishing the structure vs fishing the void of water behind it.
So what does it do? Well now that you know your drift speed, your line out, your depth, etc., you can simply input that data into the calculator above and it will do the rest for you. No more guesswork on conversion factors or coefficients.
Why Your Jig Moves Sideways
So how does it work? First off, it’s based off geometry; specifically, the ratio of line extending from your rod tip compared to the actual depth of your target below. Let’s say you’re fishing eighty feet of water but you’ve let out ninety feet of line. Where did those additional ten feet go? They has to manifest themselves horizontally because the jig isn’t going any further down than where bottom is. So this thing takes that and spits out exactly how far your bait sits sideways from you. It converts the sense of being heavy down there into a real place in space.
But it gets more complicated still: drag factors includes line type and leader selection. Because braided line has such a small diameter, many folks think it go straight down, but even skinny braid picks up current if angled out. Then you throw on a beefy fluorocarbon leader right above the jig. Now you’ve got a secondary drag point pulling the thing up-current. To compensate for this, the calculator will consider how much sink your jig provide compared to how much drag your leader produces.
Surface area also plays into it. Wide flutter spoons and other bulky soft plastics increases drag leverage. More leverage means more influence the current has on terminal tackle. That’s why you’ll find narrow metal jigs excels in high-flow conditions. They cut through the water column with little resistance. They maintains a tighter angle for a more accurate vertical presentation.
All of those factors are multiplied by current speed. In shallow water where the current is little more than a light drift, it may only push your jig a few feet, but at one hundred feet down it’s creating a large bow wave of line. It pulls the bait way off of structure. That’s why the reference table on the page suggests heavier weights for deeper runs, they counteract the scope. It is not necessarily just to get it down there, but to keep it there once it reaches the bottom.
Now if you’re drifting over some rock bottom, you don’t want such a big offset angle. A large angle increases the chance of snags as the jig sweep across more area before settling into target spot. Keeping that angle under ten degrees keeps your presentation consistently exact. The rod-tip angle becomes secondary when we recognize that line in the water is far more important.
Raising the rod can improves action, but there’s not much we can do with our hands on the rod to adjust for an unfavorable angle created by excessive drag or line scope. Instead, adjusting inputs prior to dropping the jig is what realy makes the difference. You can lighten the drag, use a slimmer main line, or go up a size in jig weight. These steps will all lessen the drift angle better than wrestling with your rod hand.
It’s as much about playing off the physics of the water column as it is different than against it. And once you learn how the line lays in the current, the bait placement stops being a guess and starts being a direct delivery to where the fish are positioned to eat. That understanding transforms an otherwise frustrating drift into a productive and controlled presentation.