Loop Rig Snood Spacing Calculator
Estimate loop-to-loop spacing, branch swing clearance, total rig body length, lower hook height, and tangle risk for loop rigs, flapper rigs, clipped paternosters, and boat traces.
📌Loop rig presets
⚙Snood spacing inputs
Measure from the loop knot or boom exit to the hook eye after tying.
Loop rig spacing results
Calculation breakdown
🧵Loop rig material data
20 lb Mono
40 lb Mono
50 lb Fluoro
Wire Boom
📏Snood spacing reference table
| Rig type | Typical snoods | Finished snood | Loop spacing | Body length | Best condition |
|---|---|---|---|---|---|
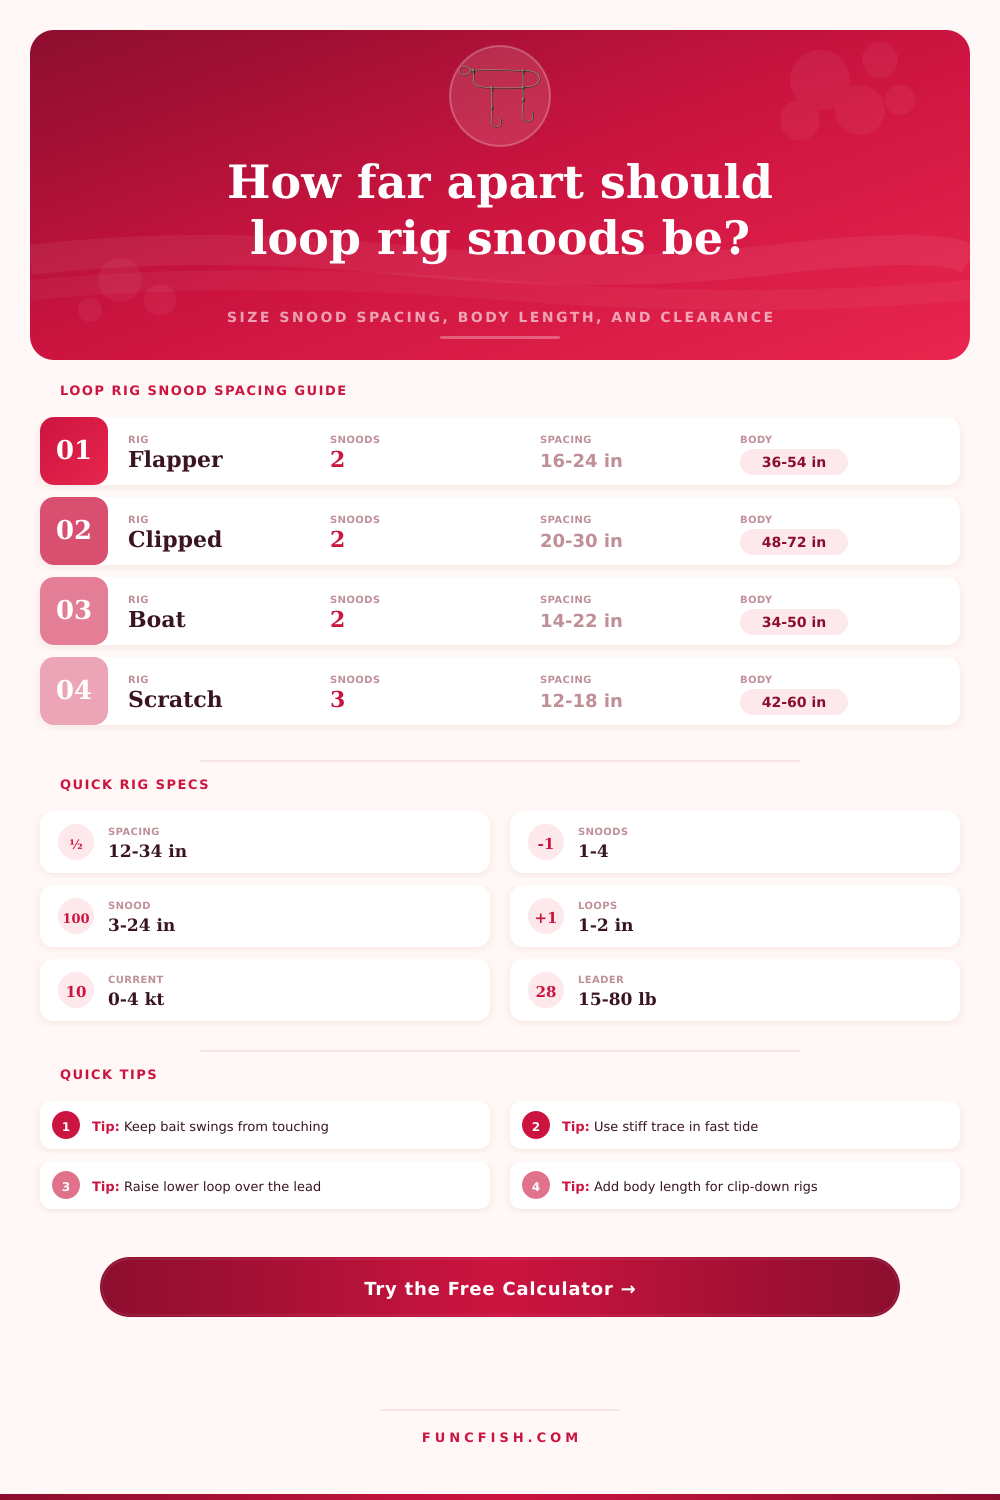
| Two-hook flapper | 2 | 8-16 in / 20-41 cm | 16-24 in / 41-61 cm | 36-54 in / 91-137 cm | General surf and pier fishing |
| Clipped paternoster | 2 | 10-18 in / 25-46 cm | 20-30 in / 51-76 cm | 48-72 in / 122-183 cm | Distance casting with clipped baits |
| Boat ledger trace | 1-2 | 6-14 in / 15-36 cm | 14-22 in / 36-56 cm | 32-50 in / 81-127 cm | Vertical drops and wreck edges |
| Three-hook scratch rig | 3 | 4-10 in / 10-25 cm | 12-18 in / 30-46 cm | 42-60 in / 107-152 cm | Small baits and calmer water |
| Long-snood specimen rig | 1-2 | 18-36 in / 46-91 cm | 28-44 in / 71-112 cm | 60-96 in / 152-244 cm | Clear water and wary fish |
🐟Species and bait spacing table
| Target | Bait style | Hook range | Snood range | Spacing note |
|---|---|---|---|---|
| Flatfish | Worm or small strip | Size 4 to 1/0 | 10-20 in / 25-51 cm | Allow rolling bait movement along bottom |
| Bass and stripers | Fish strip or live bait | 2/0 to 6/0 | 16-30 in / 41-76 cm | Long baits need wider loop separation |
| Cod and pollock | Large cocktail bait | 3/0 to 6/0 | 12-24 in / 30-61 cm | Keep lower loop above lead wash |
| Bream and porgy | Shellfish, crab, shrimp | Size 4 to 2/0 | 6-14 in / 15-36 cm | Shorter snoods reduce missed bites |
| Mackerel and scad | Feathers or small lures | Size 8 to 2 | 3-8 in / 8-20 cm | More branches need tighter spacing |
⚖Loop rig comparison grid
| Layout | Tangle control | Bite coverage | Cast profile | Spacing adjustment |
|---|---|---|---|---|
| Open flapper | Moderate | High | Open bait swing | Add 2-6 in when snoods exceed 14 in |
| Clipped-down loop | Good while casting | Medium after release | Streamlined | Add clip release allowance and bait tail room |
| Wire boom loop | Very high | Medium | Bulkier trace | Can shorten spacing if boom stand-off is stiff |
| Three-hook scratch | Lower | Very high | Compact | Short snoods only; avoid long bait tails |
| Long specimen snood | Lower | Selective | Long body | Spacing should exceed snood plus bait swing |
🔗Loop and knot allowance table
| Connection | Allowance | Strength note | Spacing effect |
|---|---|---|---|
| Simple dropper loop | 1-2 in / 3-5 cm | Good for light to medium trace | Loop size becomes part of swing radius |
| Twisted dropper loop | 2-4 in / 5-10 cm | Better stand-off than simple loop | May reduce spacing by 1-2 in |
| Three-way swivel branch | 1-3 in / 3-8 cm | Strong and easy to replace | Add swivel length to lower clearance |
| Crimped boom or clip | 2-5 in / 5-13 cm | Useful for stiff heavy traces | Include clip travel before final body length |
| Water knot hooklength | 1-2 in / 3-5 cm | Low profile for lighter rigs | Short allowance, less stand-off |
💡Spacing tips
Swing clearance: For open loop rigs, the useful spacing is not just the snood length. Add bait tail, hook bend arc, loop stand-off, and current angle so the upper bait cannot sweep into the lower hook.
Trace length: If the calculated body becomes awkward for casting, shorten the snoods first, then reduce hook count. Keeping the lower loop high enough above the lead usually prevents more tangles than trimming the top tag.
But this time you’ve got that loop rig tied on with a perfect balance on the second throw of the day, and then you see it start to unravel into a ball of wretchedness before it even hits the water. Every shore angler know that heart-sinking feeling, and more often than not it’s about space between two hooks, not your knot tying ability, and certainly not the line’s quality.
Because getting the spacing right prevents components from intersecting, the rig will land straight and set nicely, whereas if the hooks is too close together, their swing arcs intersect in current and create a magnetic field for tangles. That same lack of interference keep the loop rig together for hours in heavy swell. The snood are separated.
Why Your Fishing Line Gets Tangled
This isn’t as simple as getting out your tape measure and working out difference between lines. You also need to consider physics of your cast. How far apart do your baits needs to be to let them swing freely without hitting each other? A small, short worm and hook don’t take up much room at all but a live mackerel or big old ragworm casts quite a wide arc and require some decent clearance.
Too close together and every time tide moves your top bait sweeps down and snares the lower hook. The calculator above do the maths for you when you input your bait size and how stiff the trace is. This way, you aren’t left guessing how many extra inches of air you might actualy require between the branch and the bait, and you know you’ve given the bait the space it physically needs.
All of this depend on material selection, as different options will allow the rig to hold itself better or collapse during the cast. Something like soft monofilament is going to collapse when you cast it and get loops folding over one another long before they hit the surf. Wire or stiffer fluorocarbon booms will stay open and separate the branches well, allowing for a tighter space while not significantly increasing your tangle odds.
That’s a give-and-take between presentation vs. It is a trade-off between presentation and reliability. If you go too heavy, you lose some bite feel but at least you have a tidy rig. You’d rather miss a few bites because your hooks are tangled then lose a fraction of those subtle taps. So being able to maintain the structure matter more than getting maximum sensitivity.
In slack water, the baits hangs pretty motionless. Accurate placement isn’t as critical since there’s no current pulling them tightly against each other. But when I throw that same rig with a strong tide or a heavy surf sweep, it pushes the hooks tighter together due to water drag. The weight sinks and wedges itself in bottom.
This means you need a little space between the bottom hook and the sinker so the bottom snood is above the wash zone created at the bottom. You don’t want it so far up that it gets caught in seaweed or dragged along rocks. Again, it’s the sweet spot many improvised rigs miss because they don’t consider how water moves things.
Many anglers don’t think about loop sizes at all. They assume that little dropper loop is a zero-length connector that doesn’t matter. In reality, it actualy provides a bit of stand-off distance. This will shorten the hook-to-hook distance unless you account for it when calculating total space between your main hooks.
The table on the page explain this for various rig styles. It shows why you can’t just multiply by two for two more hooks, as the drag increases and there is a bigger chance of them intersecting. It also illustrates how much longer the whole rig gets with each additional snood.
All of this means you’re creating a system that needs to endure violent acceleration on the cast and immediately stabilize when it hits the water. It needs to be able to sense a bite in changing currents. It’s less about making pretty knots than it is understanding how each piece requires its own space in relation to another, and then respecting those boundaries.
Once you know why everything is spaced out like that, you’ll no longer view it as some random measure but rather a functional boundary. This shift in perspective will change your frustration with the tangle into a desire to straighten it up and get it to hit right where you would of wanted it.