Fishing Rod Ferrule Position Calculator
Lay out rod ferrules by blank length, section count, ferrule style, bend zone, handle clearance, guide spacing, and required overlap.
📌Scenario presets
⚙Rod and ferrule layout
Butt cap to front of foregrip or reel-seat hood.
Use static deflection if known; otherwise preset action data is blended in.
Ferrule layout results
Calculation breakdown
📊Ferrule data grid
Tip-over-butt
Solid spigot
External sleeve
Metal butt
📐Ferrule placement references
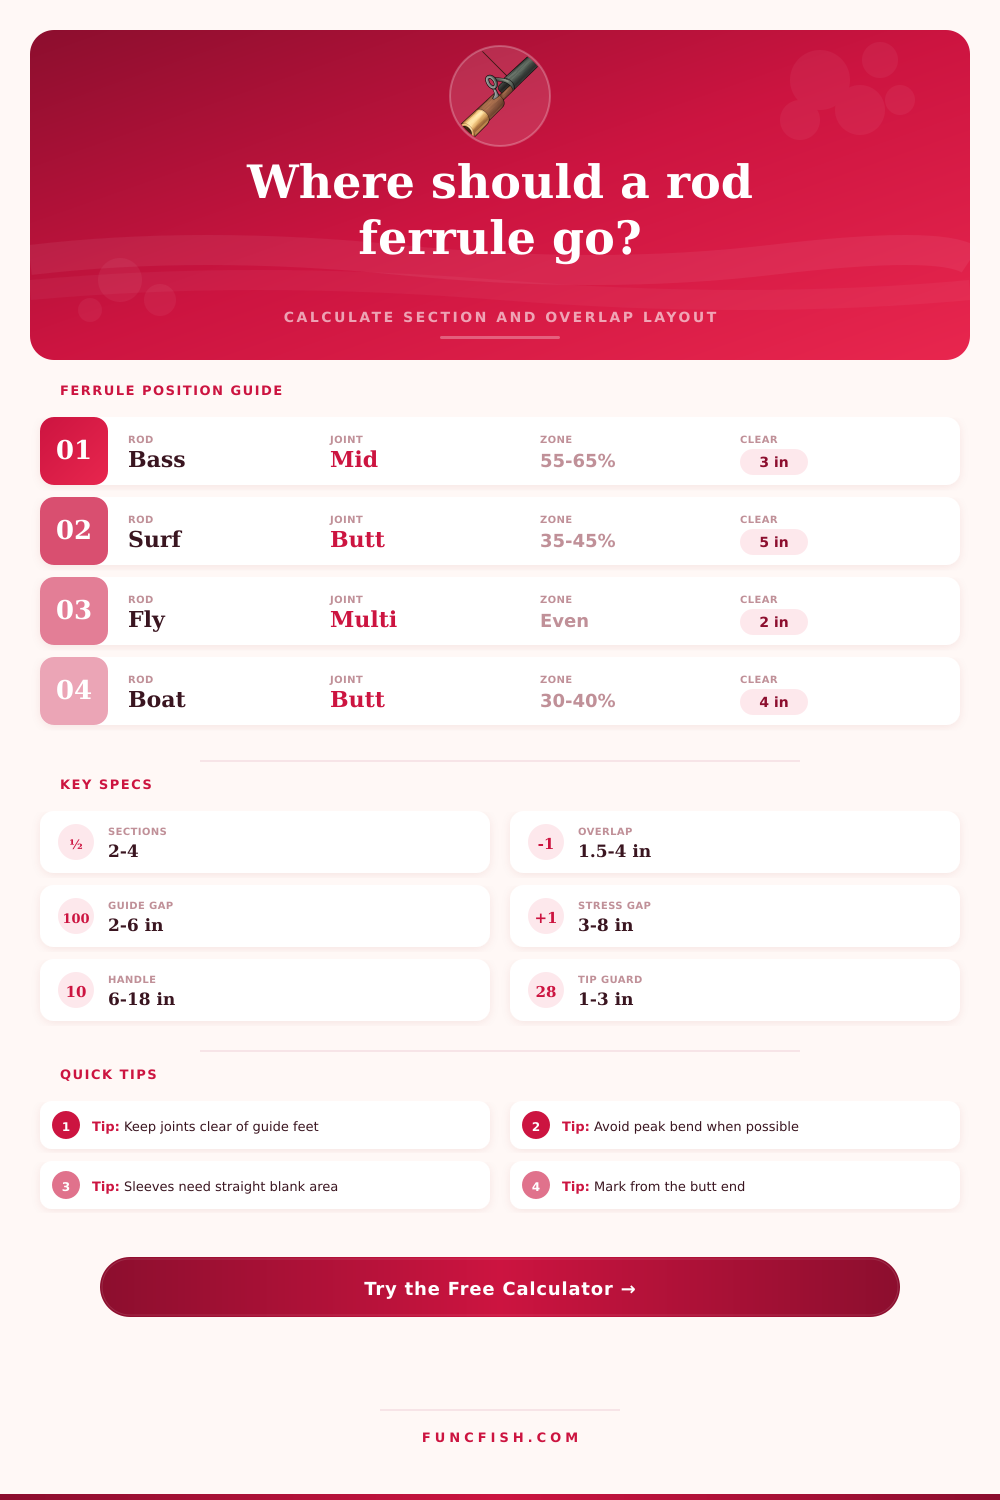
| Rod type | Common section plan | Ferrule zone from butt | Typical clearance target |
|---|---|---|---|
| Bass spinning rod | 2-piece near equal split | 48% to 52% | 3 in from guide wraps |
| Fast bass casting rod | Butt section slightly shorter | 43% to 49% | 3.5 in from guide wraps |
| Ultralight trout rod | Spigot or travel split | Equal sections with small offset | 2 in from guide wraps |
| Surf casting rod | Butt joint below hard bend | 38% to 46% | 5 in from large guide feet |
| Boat trolling rod | Metal or sleeve butt joint | 28% to 40% | 4 in from roller frames |
| Four-piece fly rod | Even pack length | 25%, 50%, 75% | 2 in from snake guides |
| Ferrule system | Starting overlap rule | Blank fit note | Adjustment when high load |
|---|---|---|---|
| Tip-over-butt | 1.8 to 2.4 in on bass rods | Female wall must not bottom hard | Add 0.25 to 0.5 in engagement |
| Solid spigot | 6 to 10 times local diameter | Leave a visible wear gap | Use longer spigot on heavy power |
| External sleeve | 3.5 to 5 times local diameter | Needs straight, sanded contact | Lengthen sleeve before moving tipward |
| Internal plug | 4 to 6 times local diameter | Works best in butt half | Use conservative clearance margin |
| Metal ferrule | Manufacturer socket depth | Check shoulder alignment | Keep in low-flex rear blank |
| Travel joint | Factory-style equal sections | Offset only enough to clear guides | Blend length and guide clearance |
| Action | Peak bend estimate | Keep-out band | Preferred shift |
|---|---|---|---|
| Extra-fast | 68% from butt | 62% to 75% | Move joint buttward |
| Fast | 64% from butt | 58% to 72% | Move 1 to 3 in buttward |
| Moderate-fast | 59% from butt | 52% to 67% | Use balanced adjustment |
| Moderate | 54% from butt | 46% to 63% | Favor equal fit and overlap |
| Slow / parabolic | 50% from butt | 40% to 62% | Use longer ferrule support |
🐟Practical ferrule checks
Static deflection check: If the calculated mark lands in the deepest bend, move it toward a lower-strain section or increase ferrule engagement before cutting the blank.
Guide train check: Mark all guide feet, wraps, trim bands, and sleeve edges on masking tape. The calculator clearance is measured to the ferrule shoulder, not the decorative wrap edge.
Building a fishing rod require people to make many decision. Each of these decision can cause problems for the fishing rod if made incorrect. One such decision is the placement of ferrule, which is the joint between two section of a fishing rod.
The placement of the ferrule is important because it will impact how the fishing rod will load, and it will impact where the fishing rod bend. If not placed correct, it could cause stiffness in the wrong part of the fishing rod, or it could create a hinge in the fishing rod if the fish are hooked. The calculator require people to enter several input into the calculator to allow for the calculation to be performed.
Where to Place the Ferrule on a Fishing Rod
These input include the length of the fishing rod, the dimension of the blank of the fishing rod, the measurement of the handle of the fishing rod, and the style of ferrule that the builder will use in the construction of the fishing rod. Each of these input is important because the style of the fishing rod will change the way the guide are arranged along the rod, and it will also change the amount of clearance that will be required around the joints. The power level of the rod is also important because different blank will require more engagement at the joint than others to prevent the joint from becoming loose.
The action of the fishing rod is also important because this will determine where along the fishing rod the ferrule cannot be place. Most fishing rod builder will first decide how many section the fishing rod will have and how long the fishing rod is intended to be. Many use the layout priority setting to decide the length of each section.
This setting will allow the builder to decide whether they want the section of the fishing rod to be balance with each other or unbalanced with each other. Balanced section are often a benefit for those who travel with their fishing rod because they are light. However, if the fishing rod is to have a shorter butt section, then the handle hardware will be more useful in that situation.
The calculator will adjust automatic according to the layout priority that the fishing rod builder selects. However, the designer will have to review the suggested length to determine whether these are appropriate for the builders fishing style. Moving the joint will change the length of the sections of the fishing rod.
Another factor that must be considered in the construction of a fishing rod is the type of ferrule that will be used. The solid spigot joint that is used for the ferrule will behave different than an external sleeve or a metal butt connection. Each ferrule connection has specific requirement for the overlap of the two section of the fishing rod.
Additionally, the type of ferrule used will also impact the stiffness of the joint between the two section. The length of the overlap will be determined by the diameter of the fishing rod at the joint, the power setting of the fishing rod, and the risk level of each section of the fishing rod. Each of these factor will allow the calculator to suggest an overlap for the joint.
This suggested length will prevent the joint from bottoming out within the blank, as well as prevent the development of a hard spot along the fishing rod. If the blank of the fishing rod have a loading zone that loads deeper than the average load of a fishing rod, then the overlap can be increased, or the builder can move the joint a few inch away from the peak bend area where the greatest amount of strength is required. Another constraint in the construction of a fishing rod is the clearance that must be allow for the guides.
One of the difficulty in fishing rod construction is ensuring that the ferrule shoulder does not sit either directly under one of the foot of the guide, or within the wrap around the rod blank. Many fishing rod builder will use the reference material to determine the clearance that are required by each guide. With this information, they can lay the fishing rod guide onto the blank with masking tape to ensure that they have the proper clearance.
The guides should be mark onto the blank of the fishing rod first. Then, the builder will check the placement of the joint relative to these guide. If it is found that the joint is too close to one of the guide, the builder will move the joint by a few inch to avoid creating a weak spot in the fishing rod.
One of the last area that a fishing rod builder must consider is the stress zone along the blank of the fishing rod. This zone is where the blank creates the tightest curve when the fishing rod is under load. Placing a joint within this zone will create a change in the stiffness of the fishing rod.
This change in stiffness could lead to the fishing rod feeling as if it have a hinge where the joint is place along the fishing rod. The stress zone can be calculate from the action of the fishing rod and the percentage of the bend that occurs at the peak of the fishing rods bend. Based on this calculation, the joint should be moved outside of the stress zone.
In some instance, however, it may be impossible to move the joint outside of this zone. In these instance, the overlap at the joint can be increased, or a different ferrule style can be choose. Finally, it should be noted that the calculator will never be able to fully capture the feel of the fishing rod that will be created through the fishing rod building process.
The calculator will never be able to fully calculate the impact that the joint will have upon the recovery of the fishing rod. In these case, many fishing rod builder will first create a test piece of the fishing rod to determine whether the joint will have any negative impact upon the recovery of that fishing rod. Additionally, the section of the fishing rod can be taped together to test the impact that the joint will have upon the fishing rod before fully commit to the cut that must be made to each section.
Although the calculator will provide the start to the construction of the fishing rod, the blank fishing rod will provide the last and final information to the fishing rod builder regarding any adjustment that need to be made to the position of the joint. The goal of each fishing rod builder is to create a fishing rod that pack without weak spot, and one that will fish in the manner that the fishing rod builder intend for it to fish.