Chartplotters from Raymarine might have a decent reputation in the market when it comes to their extensive range of features, but these units aren’t the easiest to use.
If you browse through the community forums for a few moments, it will be clear that anglers sometimes struggle with the basic navigation on this system.
So, if you wish to avoid the same issues with the Raymarine Chart plotter, just go on a few fishing trips with local experts. That way, you can learn some great tips on how to manage your system.
Similarly, going through the manual and some online tutorials will help understand the basics of the Raymarine system. So, if you’re struggling with the Raymarine chart plotters, just follow the information mentioned here.
How To Use The Raymarine Chartplotter
From tacks to basic waypoints, you should always prioritize basic navigation features when using the Raymarine system.
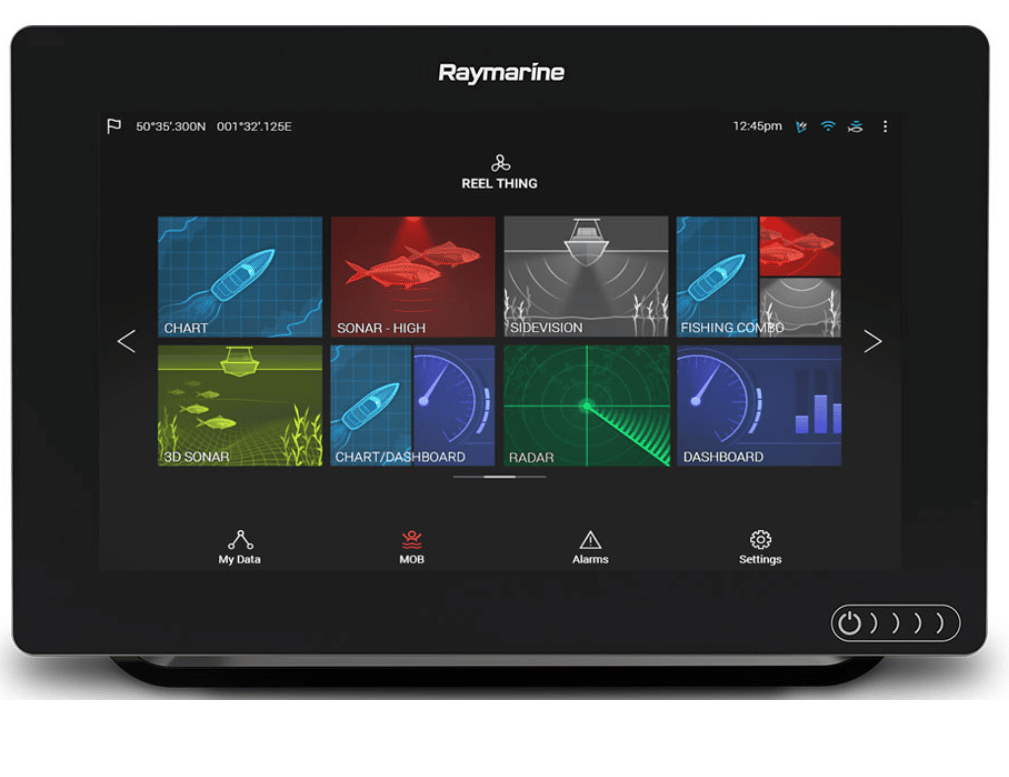
If you’ve recently installed a chart plotter from the A or C series, then the following steps will provide you with a clearer perspective on the performance of the Raymarine system.
The first thing that you need to learn with the Raymarine Chartplotter is to mark waypoints and then navigate to them.
Even though there are a ton of other features depending on the Raymarine model you’re using, the basics are consistent across all units. So, use the cursor on the Raymarine Chartplotter to create a waypoint at your current position.
The system will create a waypoint in your database, and you can modify the waypoint name to keep track of your list.
You can further add symbols to the waypoint to mark some specific spots around your fishing region.
Once the waypoint has been saved, you can rely on the “Go-To” feature to set routing to the waypoint. You can either set the routing from your current vessel location or from a different waypoint in your saved list.
After selecting the routing features, the unit will start the routing to your desired waypoint. Now, you just have to keep track of the location of the boat relative to the defined route to stay on track.
Lastly, it is better to switch to the navigation mode that helps you stay on course.
So, instead of looking at the whole map, switch to the detailed model, and it will become much easier to keep your boat on the right track. Moreover, you will save some time as you try to reach the desired waypoint.
Even though it will still take some time as you experiment with the basics on your Raymarine Chartplotter, going through these steps will give you a better understanding of the basic features.
Once you’re confident in these basic navigation skills, it will become much easier to get through your fishing trip.
So, if you’ve just brought your first Chartplotter from Raymarine, make sure to get through these steps.
This will give you a rough idea of how to access the basic navigation skills on your Raymarine system. Try to also seek help from the customer support experts if you get stuck on a particular step.
Waypoint Grouping
Now that you have a basic understanding on how to use waypoints, the issue remains on how you can best manage them and create groups for a comprehensive look.
Luckily, relying on the groups will serve you well, and you can personalize the given data accordingly.
All that you need to focus on is sorting out the data to better access the desired information. Sorting all of these points will help you get the most out of your display without having to deal with all the extra clutter.
The only downside here is that you can’t place a single waypoint into multiple groups. So, you can think of these points to be mutually exclusive.
All that you can do here is to create new points with similar coordinates to avoid the hassle or the confusion.
Will it be challenging? Probably! However, you’re not left with many options. With that said, all the new waypoints that you create are placed in the “my waypoints” group.
This is the default group and contains all the freshly created waypoints.
You can move the waypoints from this group to other custom groups by first creating the group and then moving the list.
To do that, you need to first go to the option of “review and edit waypoints” and then access the “waypoint groups.”
At this point, you will be presented with the group list and you can click the option of “make a new group” or edit the name of the existing groups to modify the selection.
Once you’ve created all the groups that you will like to use, the next step is to sort out the waypoint. You can easily move the waypoints from one group to another by relying on the “move between groups” option.
This will open up a window with the two groups presented, and you can fill up the new group by moving the waypoints from the default group.
It might take a bit of your time, but once you’re through the initial hassle, managing the waypoints will become way easier.
Keep in mind that you won’t be able to sort everything out perfectly the first time around, and will likely have to go through a few cycles to find the perfect setup.
However, once you’re through with all of the hassle, the fishing experience will be way sweeter.
Integrating Navionics Charts
One of the main reasons behind the incredible support of Raymarine systems is the Navionics charts. These charts help owners streamline their routes and rely on the existing data to better plan out their journey.
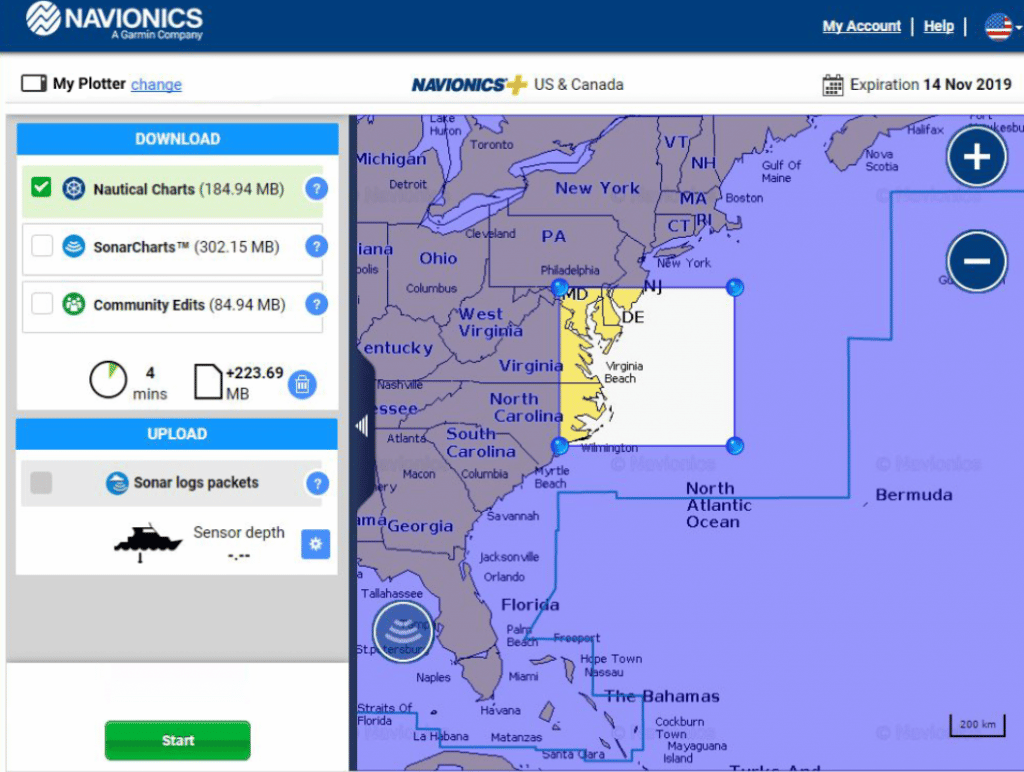
You may simply depend on the SD card to assist you with the installation for either the Navionics+ or Platinum options, both of which provide a wide variety of capabilities.
Simply insert the SD card to begin the procedure, and then activate it on the official Navionics website. You may download the chard installer from there and register for an account to log in.
This card will now be enabled, and you may install it in your chart plotter by inserting it into the adapter.
Check to see whether the contact points are in touch with the Raymarine chart plotter’s points.
From there, you can just wait a few seconds and let the Chartplotter process the card.
Once you’re through with the installation, just start by checking the time and adjust the Time offset. This will be the first step when it comes to integrating the navionics chart.
From here, you can go to the chart icon on your Raymarine system and check for details. You likely won’t have any details if you’ve just installed the card. So, you need to access the settings and then select the Navionics charts.
This will present a ton of information on the display and you will likely be overwhelmed with the clutter.
So, you will have to modify the layout and manage the layers as well as the design to fit your preferences.
Now, determining the ideal match for each fisherman involves a lot of information. There are no quick cuts here; you’ll just have to learn that lesson the hard way.
Access the options and play around with various colors, curves, and layers. That ought to be sufficient to alter your viewpoint.
The ideal situation, however, would be if you could reproduce the setups of the local specialists and seek their advice. So be sure to ask for and accept assistance. Even if it will take longer, there won’t be any mistakes to deal with.
Hopefully, you won’t be perplexed, and seeking assistance from the local specialists can greatly simplify your life. Simply don’t be reluctant to ask for assistance when you need their advice to have a better experience.
Wrapping Up
Managing the Raymarine chartplotter can be a bit overwhelming (especially when you have no prior experience with this system).
So, we’ve listed some details to help you get started. Now, you will not be an expert after going through with these pointers.
However, you’ll still be able to grasp the basics when it comes to creating way points, managing groups, and integrating the Navionics charts.
From there, you can also go about modifying the basic overlay to make it easier on your eyes as well.
Yes, it will take a lot of hassle and time to figure out the best configurations. However, there is no better method than trial and error.
It will take you more time that way, but you will be a lot more knowledgeable when it comes to using Raymarine Chartplotter.
Lastly, if you want to avoid all the hassle, then you can get help from the local experts.
Just ask them for their configurations and copy them onto your system. That way, you will have a decent starting point and won’t have to worry about as much hassle when it comes to managing this system.