Ice Fishing Dead Stick Setup Calculator
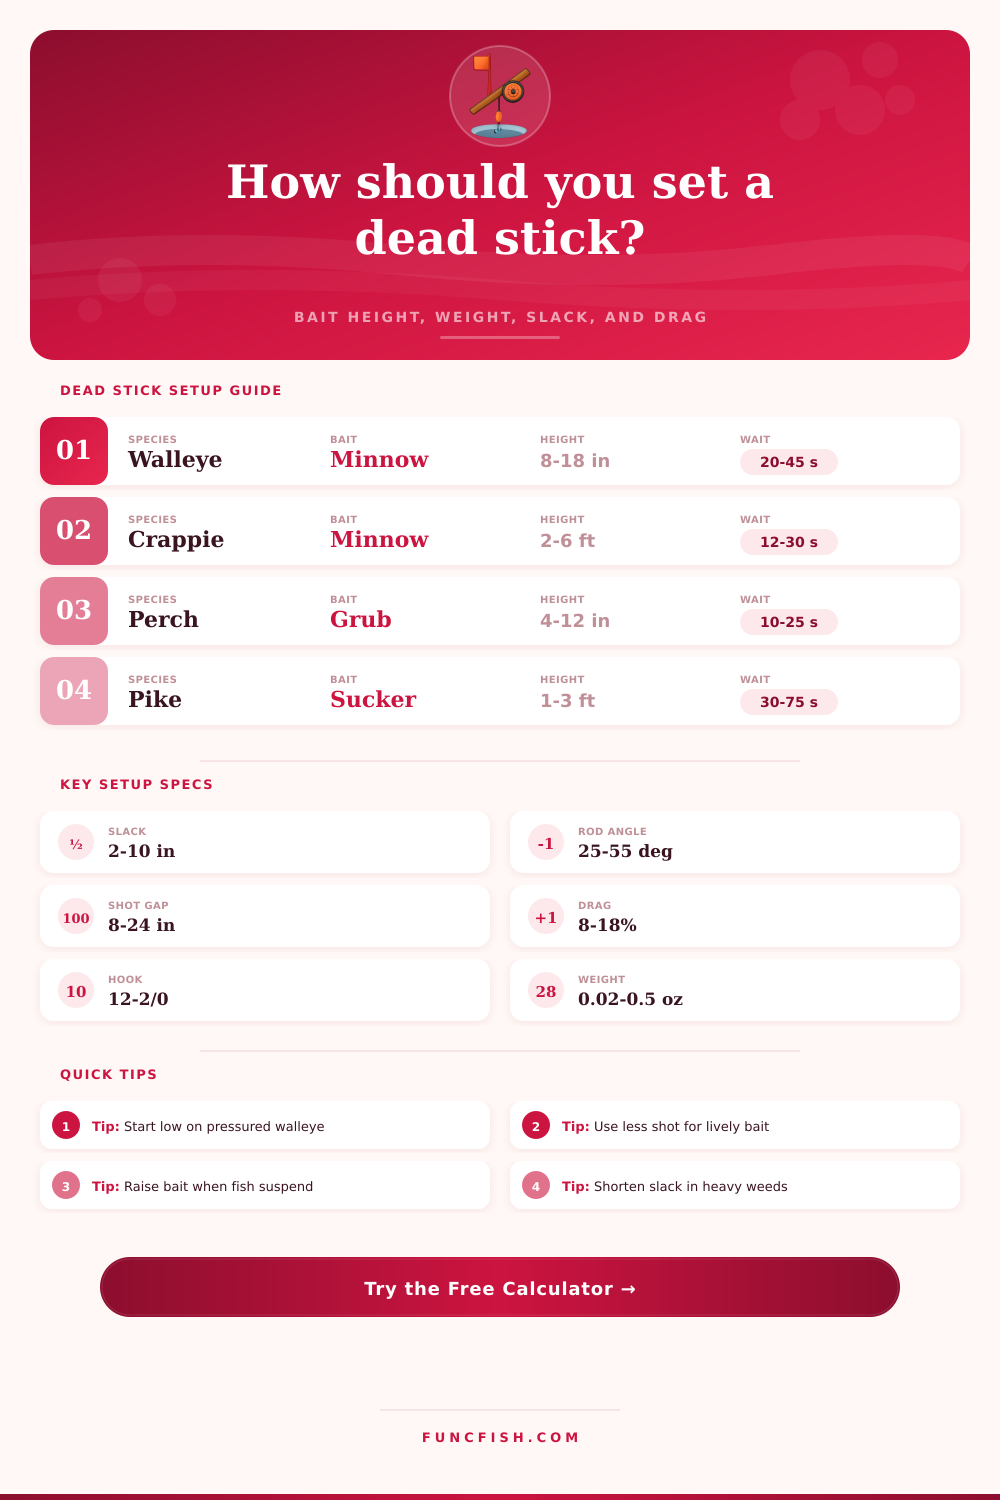
Estimate dead-stick bait height, weight, slack, rod angle, hook size, drag setting, and response timing from species, depth, bait, line, and winter conditions.
🎯Setup presets
⚙Dead-stick inputs
Recommended dead-stick setup
Calculation breakdown
🧰Dead-stick equipment data
📊Species setup ranges
| Species | Typical bait height | Hook range | Line range | Dead-stick note |
|---|---|---|---|---|
| Walleye | 6-18 in above bottom | #8 to #2 | 4-8 lb fluoro/mono | Allow fish to load the tip before sweeping. |
| Crappie | 2-8 ft below marks | #12 to #6 | 2-4 lb mono/fluoro | Keep slack short and weight light. |
| Yellow perch | 4-12 in above bottom | #12 to #6 | 2-5 lb mono | Small baits work best near bottom. |
| Northern pike | 1-3 ft above weeds | #2 to 2/0 | 10-20 lb plus leader | Give strong bait room to swim. |
| Lake trout | 3-12 ft off bottom | #2 to 2/0 | 10-20 lb fluoro | Higher sets help cruising fish see bait. |
| Bluegill | 6-24 in above weeds | #14 to #10 | 1-3 lb mono | Use tiny weight and a very soft tip. |
⚖Weight and resistance guide
| Setup | Best for | Weight range | Slack range | Resistance goal |
|---|---|---|---|---|
| Split shot above hook | Minnows and grubs | 0.02-0.20 oz | 2-8 in | Hold depth but allow flutter. |
| Slip bobber | Crappie, perch, walleye | Balance to float | 1-4 in | Minimal fish feel on pickup. |
| Plain hook dead stick | Shallow clear water | 0-0.05 oz | 3-10 in | Maximum live-bait motion. |
| Rattle reel | Shelter set lines | 0.08-0.35 oz | 6-18 in | Fish can turn before pressure. |
| Heavy current hold | River or neckdown ice | 0.20-0.60 oz | 1-5 in | Keep bait near the target lane. |
🔗Hook and bait matching
Tiny baits
#14-#10Spikes, waxworms, micro plastics, and small bluegill presentations need very low holding weight.
Small minnows
#10-#6Good for perch, crappie, and finicky walleye when fish are reading bait carefully.
Medium minnows
#6-#2Common dead-stick size for walleye and whitefish with fatheads, shiners, or rosy reds.
Large baitfish
#1-2/0Pike, lake trout, burbot, cisco, smelt, and sucker rigs need more gap and more leader strength.
| Bait behavior | Rod angle | Sinker gap | Leader note | Best signal |
|---|---|---|---|---|
| Quiet waxworm | Low 15-25 deg | 4-8 in | Fine mono | Soft tip pulse |
| Light minnow | 25-35 deg | 8-14 in | Thin fluoro | Tip lift |
| Active shiner | 35-45 deg | 14-22 in | Medium fluoro | Steady load |
| Big sucker | 45-55 deg | 22-36 in | Wire option | Deep bend |
💡Dead-stick calculation notes
Height tuning: Start from the fish mark or species baseline, then move lower for negative bottom fish and higher for roaming suspended fish.
Weight tuning: The right split shot holds the lane without pinning bait in place. Lively shiners and current need more control than waxworms or soft plastics.
Three rods is dangling in the water. You’re standing out on a frozen lake. Rather than being about fishing, it’s all about keeping your anxiety in check. Set bait down. Drop line in. Wait. The tip of rod comes alive. What do you do? Do you swing now, or do you wait another second before the fish turns around? That split-second decision can be the difference between a full cooler or an empty one.
For dead sticking, it is about passive fishing. You use a strategy that makes every detail more important then reaction time.
The Math of Dead Sticking
Plug in your conditions and species into the calculator above and it’ll do all the number crunching for you (without all that conversion and coefficient guessing). But when it comes to understanding why those numbers change, you need to understand how fish behave in ice. A walleye hovers just off the bottom, reading vibration from beneath him. A crappie suspends over basins and timbers in a school. A pike hunts the edge of weeds with aggressive force. Every species want a different vertical offering. No amount of patience will trump the fact that your bait needs to be at the same depth as the fish is holding. Get there first.
The bait height are the key with this deal. This is where the tool makes an estimate based off either what the typical species does or where you mark something on the sonar. So if you’re seeing marks 12″ off the bottom you’d set for 12″ off the bottom. However, all bets are off on water clarity. Fish will suspend a little more in clearer water. They can sense things better with their laterals in stained water than they can in clear water. And in stained water they are going to bite that bait dropped down nearer to the structure more times then not. You have to be able to see those marks on your flasher and make sure they match. The calculator takes those marks into account based off your choice of water clarity.
Dead sticking is all about dynamic tension created by slack and weight. • Sufficient weight holds the bait in the strike zone without moving the bait or drifting. Too little weight and the fish can swims off with the bait while you’re feeling nothing. • Overkill and you pin the bait down killing its action. Quiet baits like waxworms require tight control. Lively baits such as shiners requires greater slack and less resistance to allow for their natural swimming motion.
This is laid out in the reference table on page. It’s a matter of trading off letting the bait swim versus holding it in striking distance. The steeper the angle the quicker the tip will react. So a steeper angle is going to load the rod sooner and give you an earlier bite indicator. Conversely the shallower angle gives you more cushion for those cautious fish to take the bait without feeling any sudden resistance. That’s what you’re looking for with negative fish or spooky fish. They sniff around, get some pressure, spit it out in a heartbeat if they feel anything tightening down on their bait. Based off the species you’re fishing and the power of your rod, the calculator recommends angles anywhere from twenty five to fifty-five degrees.
It’s a subtle difference but critical. What you’re doing is adjusting the sensitivity of your whole setup to match how comfortable the fish feel.
Also consider the drag and hook size as part of the puzzle. The bigger the hook the more line slack the fish have to inhale the bait. The smaller the hook the less slack. You want to drag just tight enough to set the hook with your sweep yet light enough to let them get a short run. That is the sweet spot where the fish never knows until it has a hook in it. Those relationships are explained in the breakdown section and will help you visualize how the force transfers down from the rod tip, along the line to the bait.
You learn it by feel. Dead sticking isn’t something you can learn overnight. It takes time and observation. You’re going to get your depth wrong, and you’ll set up too early or too late. But every mistake helps teach you about how that specific lake operates. You should of seen it happen before. So use the presets as a guide and make tweaks from there.
Once you start getting some bites, it won’t be magic. It will be math + patience. And pretty soon, you’ll know exactly when to sweep before the tip even has time to bend.