Indicator Depth Setting Calculator
Estimate the indicator-to-fly setting, bottom clearance, shot spacing, and upstream lead for nymphs, beads, bait, and float rigs in moving or still water.
📌Scenario presets
⚙Depth and drift settings
Indicator depth recommendation
Full breakdown
📋Indicator and weight reference
Yarn
Foam
Slip float
River bobber
| Water profile | Starting factor | Typical angle | Lead window | Best use |
|---|---|---|---|---|
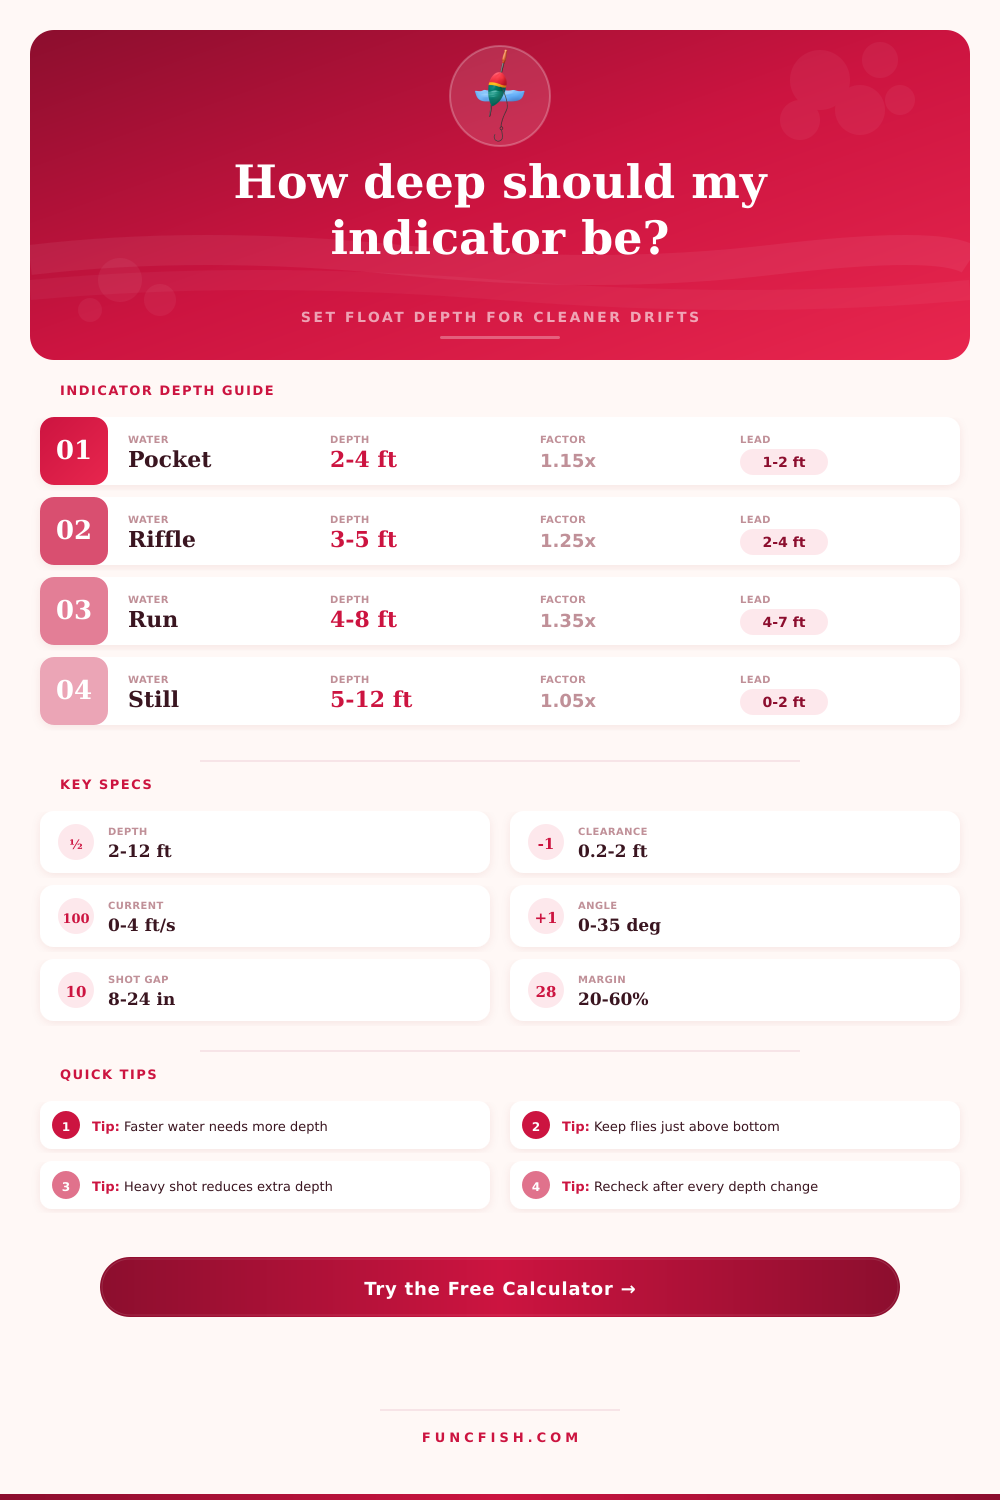
| Pocket water | 1.10-1.22x | 8-16 deg | 1-3 ft | Short high-stick drifts |
| Broken riffle | 1.18-1.32x | 14-24 deg | 2-5 ft | Standard trout nymphing |
| Moderate run | 1.25-1.42x | 18-30 deg | 4-8 ft | Longer river drifts |
| Deep heavy run | 1.34-1.55x | 24-35 deg | 6-12 ft | Steelhead and salmon lanes |
| Slow pool seam | 1.08-1.20x | 5-14 deg | 1-4 ft | Soft current and small flies |
| Stillwater | 1.00-1.10x | 0-8 deg | 0-2 ft | Slip float or suspended bait |
| Rig pattern | Shot-to-fly gap | Depth behavior | Float load cue | Adjustment cue |
|---|---|---|---|---|
| Light nymph | 10-18 in | Slow sink, soft swing | 30-60% margin | Add depth before adding shot |
| Double nymph | 12-22 in | Moderate sink | 25-50% margin | Move shot closer in fast lanes |
| Bead or jig | 8-16 in | Steeper angle | 20-45% margin | Reduce extra depth if ticking often |
| Slip float bait | 18-30 in | Mostly vertical | 20-40% margin | Set stopper to exact target depth |
| Bobber drift | 12-24 in | Angle grows in current | 15-35% margin | Lead farther before deep seams |
| Dry-dropper | 8-20 in | Limited by dry fly | High margin | Keep dropper shorter than buoyancy allows |
💡Practical calculation checks
Tip: In moving water, the indicator setting is usually longer than the target vertical depth because the fly rides downstream and below the float at an angle.
Tip: If the rig ticks bottom every drift, reduce the setting by small steps before removing weight. If it never ticks, add depth or lead upstream.
It is mid-November. You’re standing on a slick rock in your waders shaking. You’ve fished this seam for 10 minutes and not one tug. The water is cold. It’s getting deeper and turning into a run. Your float sits there, everything seems just right. Except, it isn’t.
That’s because most times, when the presentation is technically right but depth is slightly off, like an inch, it just doesn’t feel right. Fish will relate to exact layer based on oxygen levels, temperature, and what they eat. So if you tick the bottom every other second or go over them by six inches, you might as well not be there at all.
How to Find the Right Fishing Depth
Figuring out how to get your indicator sitting right on their heads isn’t so much guesswork as much as understanding current flow under the surface. I’ve created a calculator above that runs the math for ya. But the point of having this is so you know WHY you put those numbers in there in the first place.
Most folks thinks of depth as vertical line from the surface to the bottom of the river. That’s where they are incorrect. Unless current is absolutely dead still, your rig isn’t hanging straight down in moving water. Because of the current, there is an angle formed between your fly and indicator. And the larger the angle, the faster the water is moving over the bottom compared to how fast it’s moving on top. So if you’re going to represent the actual depth of the hole with your line from the float to your nymph, you’ll have to factor in that diagonal distance; otherwise, you’ll end up fishing way too high without ever knowing it.
Now think about your weight pattern. A light split shot will float down gradually and let the fly drift unimpeded, but it will also take more time getting to target zone. On the other hand, a heavier bead will fall like a rock, giving a steeper angle and requiring less additional line length to cover that vertical space. The calculator uses both your rig angle and your sink rate. So while you may be casting a heavy bead head nymph on a moderate run, the system recognize that it doesn’t require as much overhead adjustment as say, casting a tiny midge pattern with little weight and little buoyancy. It is a small thing but it makes all the difference when the fish gets picky.
Another important variable is how much clearance you want between the float and the bottom. Steelhead and trout frequently suspend right over the structure in mere inches of water, waiting to ambush passing prey as it falls into reach. Adjust the float too far down and the fly will drag across the rocks and begin to move unnaturally. A big no-no when trying to entice wary steelhead. Too high and you’re completely missing the feeding window. This is where the tool come in. It allows you to account for how deep you want the fly, minus your preferred clearance height, and then add enough wiggle room for both the angle of the rig and any drag caused by current. Ideally, you want the fly to feel weightless until it reaches the fish’s eye level with no tension whatsoever on the line.
A new wrinkle arises with stillwater. Since there’s no downstream flow to give that diagonal tug, the rig basically dangles vertically most of the time. So set your indicator closer to where you’re trying to get it. But buoyancy now takes center stage. To hang a slip float in 10′ of water, add just enough weight to defeat its upward tendency, without adding so much that it falls too fast past the strike zone. This is illustrated neatly by the reference table above, which shows how various indicators holds up under load and sag. Larger river bobbers is best for deep runs with significant current. Foam floats work well in riffles.
Ultimately, there is nothing like having a drift in your hand to feel how it runs. The calculator provides a good place to start without wasting time by blindly going out there and trying things. But you should of didn’t forget that you’ll still have to dial it in once you get out on the water. When the float comes through the current too quickly, you’re probably running too deep. Or you might be running too light. If you find yourself slowing way down, chances are your fly is getting hung up. Take the numbers that came back from the calculations and use them for reference. Trust the process. Let the water guide you until you find that magic layer where the fish is laying.