Outrigger Clip Distance Calculator
Calculate outrigger clip stations from pole length, base clearance, tip clearance, clip count, spread angle, elevation angle, and trolling pattern stagger.
📌Scenario presets
⚙Outrigger geometry inputs
Outrigger clip distance results
Calculation breakdown
🛠Outrigger pole and clip data
15 ft aluminum
18 ft aluminum
22 ft carbon
27 ft carbon
📊Clip station reference table
| Pole setup | Recommended clip stations from base | Typical clip gap | Common lure stagger |
|---|---|---|---|
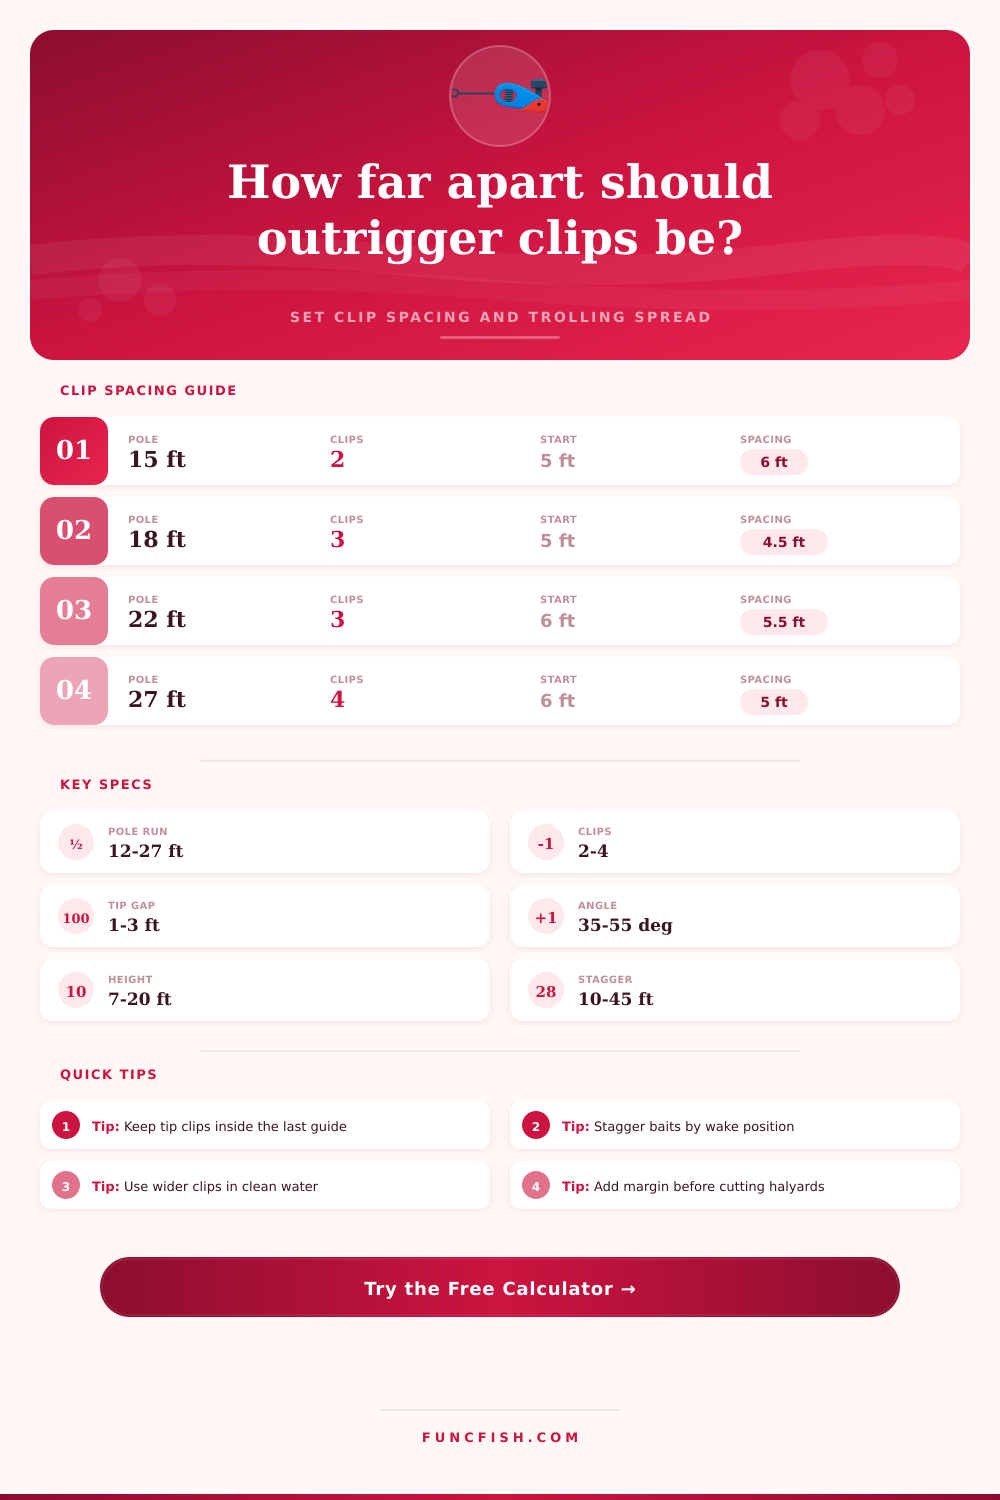
| 15 ft pole, 2 clips | 5 ft and 12.5-13.5 ft | 7-8 ft | 10-20 ft per clip |
| 18 ft pole, 3 clips | 5 ft, 10 ft, 15.5-16 ft | 5-5.5 ft | 15-25 ft per clip |
| 22 ft pole, 3 clips | 6 ft, 12 ft, 19.5-20 ft | 6-7 ft | 20-35 ft per clip |
| 25 ft pole, 4 clips | 6 ft, 11 ft, 16.5 ft, 22 ft | 5-6 ft | 20-40 ft per clip |
| 27 ft pole, 4 clips | 6.5 ft, 12 ft, 18 ft, 24 ft | 5.5-6.5 ft | 25-45 ft per clip |
🎣Species and spread matching grid
Yellowfin Tuna
3 clipsUse balanced stations with the outer clip in clean water. Keep bars and chains on wider, higher stations when the wake is heavy.
Blue Marlin
3-4 clipsLonger poles and a wide-tip pattern help pull large lures outside prop wash while keeping short teasers reachable.
Sailfish
2-3 clipsModerate clip gaps and light release pressure keep ballyhoo swimming clean with less drop-back shock on lighter leaders.
Wahoo
2 clipsHigh-speed sets usually favor fewer clips, extra tip clearance, and stronger releases to reduce snap-outs and line slap.
📏Geometry and release pressure reference
| Outboard angle | Horizontal spread effect | Aft reach effect | Good application |
|---|---|---|---|
| 30-35 deg | Narrow to moderate | Long aft reach | Rough water or small cockpit |
| 40-45 deg | Balanced spread | Balanced aft reach | General offshore trolling |
| 48-55 deg | Wide clean-water spread | Shorter aft reach | Tuna bars and billfish lures |
| 56-65 deg | Maximum side pull | Limited aft reach | Calm water, long riggers |
| Clip system | Typical release range | Best line class | Distance note |
|---|---|---|---|
| Light tension clip | 1-3 lb | 12-30 lb | Keep shorter gaps in chop |
| Standard release clip | 3-8 lb | 30-80 lb | Works with 2-3 clip spreads |
| Roller troller | 5-12 lb | 50-130 lb | Good for outer clean-water clips |
| Heavy teaser clip | 8-18 lb | Teaser line | Use extra station clearance |
💡Clip distance calculation tips
Check tip clearance: Keep the outermost clip inside the final guide or tip pulley zone. A little unused pole protects halyards from chafe and gives room for snap swivels.
Match distance to wake lanes: Clip distance sets the side spread, but lure setback sets the wake position. If two baits share one wake face, increase setback or move one clip inward.
Outrigger setup begins simply enough, most guys just go by feel, throwing their bait as far out there as they think they can get it and hoping it’s good enough. This changes when you find yourself beating on blue water and every inch of spread make all the difference between running your lure clean or tangling it up in the prop wash. The calculator above handles the math for you. It turns pole length, base clearance, and the number of clips into precise station distances to ensure your baits stays separated and effective. Let the trigonometry work itself out while you concentrate on fish.
The first limitation you’ll encounter involves pole length. A fifteen-foot aluminum pole on a center console has different physics than a twenty-seven-foot carbon rig on a sportfisher. Since the pole bases is so close to the antennas and hardtop supports, the short poles requires more care in how they are rigged. Before you begin putting out clips, you want an initial clear space, typically four to six feet away from the hinge, where your lines can be protected. If you put a clip any closer to the base, it risks snagging when turning into position. This is where the tool come into play as it subtracts whatever clearance you define at the base so it can calculate how much usable run you have for clips.
How to Set Up Your Outriggers
Using two clips is simple, but there isn’t as much coverage. Using four is wider and covers more water, but they has to be precisely spaced so they don’t cross over each other. The more release points you have the smaller the gap becomes in between. This is where the number of stations you ask for impacts average gap. You might assume equal spacing is best. However, you will find that widening your gap to the tip keeps your outer lures farther away from the wake turbulence caused by the hull. And that’s why you can select whether you want equal spacing (default) or a wider-tip pattern that matches your trolling style.
Pole length isn’t the only factor; how they project from the boat is equally important. With a 45 degree outboard angle, the spread is well-balanced and good for general offshore trolling. Opening up that angle to 55 degrees will push the lures further out into clean water, but it also make the rear reach shorter (baits are closer to the stern). For better bait action behind the boat, such as in rougher conditions where you need to see what’s going on with the tackle, narrow the angle.
Pole elevation angle is another consideration. Raising the pole higher puts more tension on the halyard release mechanism, but less drag on the line itself. The last element to this puzzle is lure stagger. Your clips might be spaced out well side-to-side. However, when running multiple baits in the same wake lane, they may be too close to the boat and still crash into each other. By staggering your lures by twenty to forty feet, you ensure each bait sits in its own distinct location within the churn of water left behind the hull. Whether you are fishing for marlin with long-line teasers or tuna with high-speed bars, your setup will include a suggested staggered lure pattern. This pattern works in both side-to-side and front-to-back directions to avoid tangles and represent a school of prey more naturaly.
Knowing what goes into the tool makes it easy to adjust as conditions dictate. It has tighter spacing on the inside and a shorter reach from the back in rough water. It provides deeper presentation and a wider spread in clean calm seas. It offers typical ranges for common pole sizes as a starting point (see the data in the tool), but then you can tweak the variables to refine your set up. Adjust the margin for the swivel and knot to give yourself some cushion so you don’t run out of line tying off your releases. But it all balances out in the end. Too much spread will be too much drag on the outrigger arms as well as being too much for the structure of your boat. Not enough spread causes prop wash, but stretching it too far risks creating excessive drag on the outrigger arms or exceeding your boat’s structural limits. When you know what your constraints are, the math is simple. Enter your pole lengths and how many clips you want to use and let it do the work for you. No more guessing at rigging and no more second-guessing when those bites start firing off.
As you head back in, evaluate how each of those lures fared based off where they were positioned. Did the outer bait run cleaner then the inner one? Was there enough gap between the third and second clip? Use this information to adjust your stagger distance or base clearance for future trips. Experience fine tunes what the numbers tell us. Begin by using the calculated stations. Make adjustments on the water if necessary. You will discover your perfect spread quicker than through trial and error, you should of seen it sooner.