Release Mortality by Depth Calculator
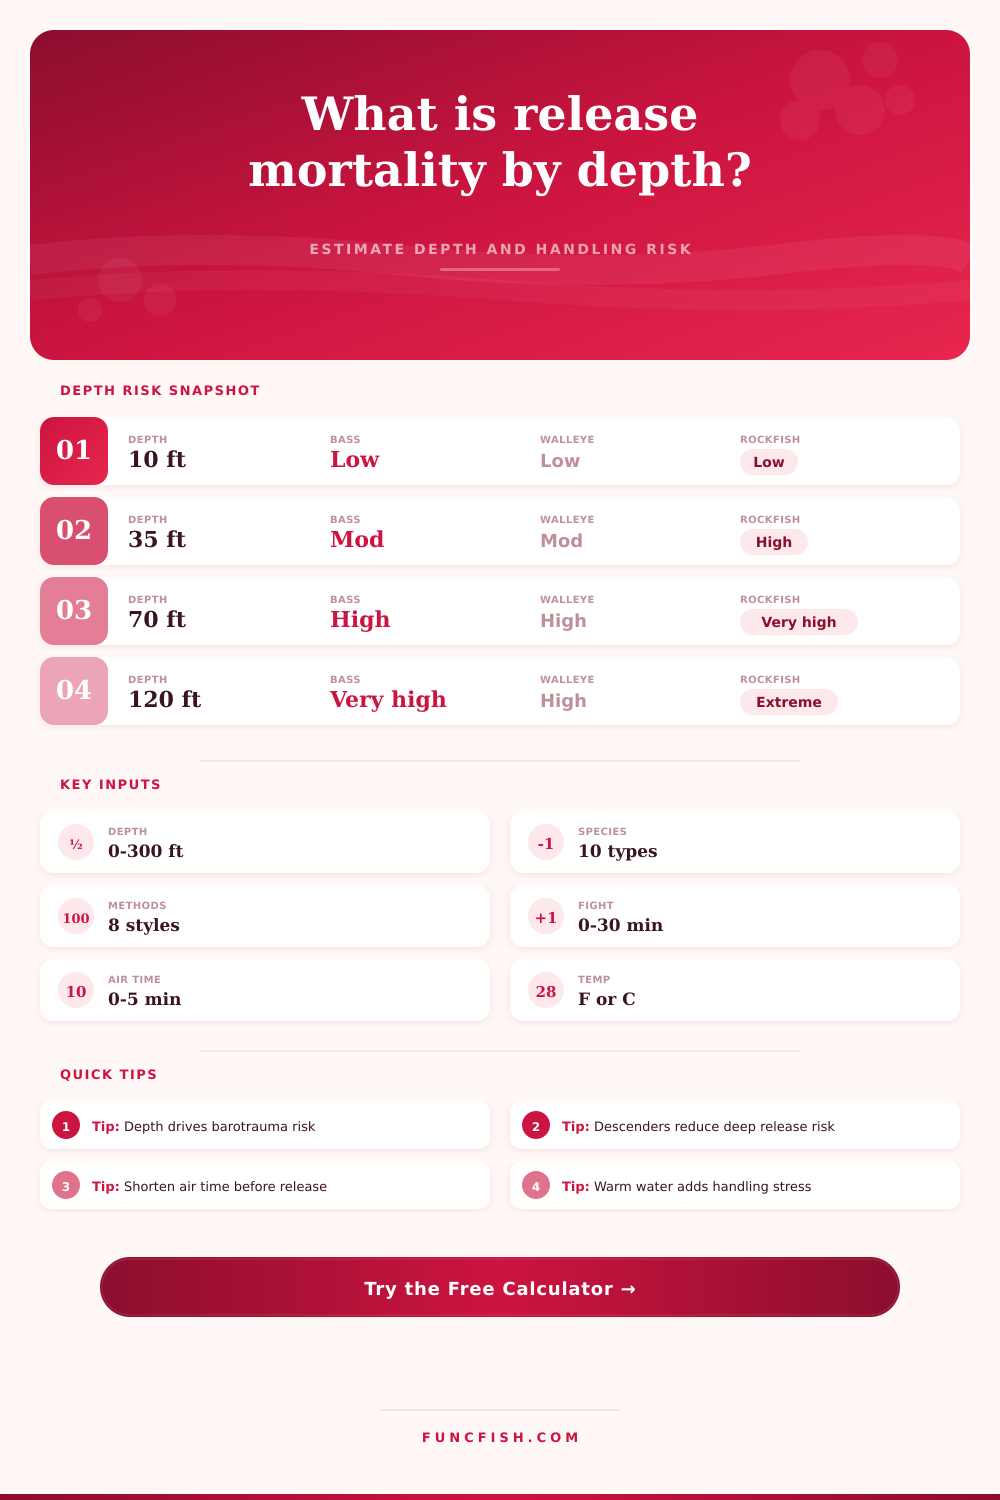
Estimate likely release mortality from capture depth, barotrauma sensitivity, temperature stress, fight time, hook location, and the release method used at the boat.
📌Depth release presets
⚙Release mortality inputs
Release mortality estimate
Formula breakdown
📋Species and release gear grid
Bass
Walleye
Rockfish
Reef Fish
📐Depth and method reference tables
| Capture depth | Pressure change | Typical barotrauma signal | Calculator weight |
|---|---|---|---|
| 0-15 ft / 0-5 m | Low | Minimal pressure effect | Light |
| 16-35 ft / 5-11 m | Moderate | Species dependent | Medium |
| 36-70 ft / 11-21 m | High | Bloated abdomen possible | Strong |
| 71-120 ft / 22-37 m | Very high | Eye, stomach, or swim bladder stress | Very strong |
| 120+ ft / 37+ m | Extreme | Recompression often critical | Maximum |
| Species group | Sensitivity | Depth attention point | Best matching release gear |
|---|---|---|---|
| Largemouth bass | Moderate | 25-40 ft | Quick side release |
| Smallmouth bass | Moderate-high | 30-45 ft | Descender if bloated |
| Walleye | High | 30-50 ft | Weighted descender |
| Lake trout | Moderate | 60-90 ft | Cold-water quick release |
| Rockfish | Very high | 40-60 ft | Descender or cage |
| Snapper and grouper | High | 50-80 ft | Cage, descender, or venting |
| Rainbow trout | Low-moderate | 20-35 ft | In-water release |
| Catfish | Low-moderate | 25-45 ft | Short handling time |
| Release method | Depth fit | Mortality modifier | When it helps most |
|---|---|---|---|
| Fast surface release | Shallow to moderate | Baseline | Vigorous fish from low depth |
| Delayed surface release | Shallow only | Raises risk | Rarely ideal after deep capture |
| Weighted descender | Moderate to deep | Lowers risk | Floating or bloated fish |
| Recompression cage | Deep | Lowers most | Slow recovery or reef species |
| Venting tool | Deep reef use | Mixed effect | Only when done correctly |
| In-water side release | Shallow to moderate | Lowers handling | Short air exposure |
| Handling driver | Low risk | Moderate risk | High risk |
|---|---|---|---|
| Fight time | Under 2 min | 2-6 min | Over 6 min |
| Air exposure | Under 20 sec | 20-90 sec | Over 90 sec |
| Hooking | Jaw corner | Lip or foul | Gill or deep |
| Temperature gap | Under 5 F | 5-12 F | Over 12 F |
| Release condition | Vigorous | Sluggish | Bleeding or inverted |
💡Calculation checks
Tip: Treat the estimate as a planning score, not a lab survival percentage. Real mortality changes with local fish condition, tackle, predators, and oxygen.
Tip: For deep captures, compare the same inputs with surface release and descender presets. The spread shows how much recompression changes the estimate.
You wrestle a smallmouth up from forty feet of water. When she’s on the deck, she’s twitching and bloated. Your instinct say to throw her back immediately, but your knowledge says doing so might kill her. But if you do, will that kill her?
As anglers who care about conservation, we’re put in a situation where fish appears healthy (but has experienced an abrupt change in pressure). This calculator uses handling method, fight time, water temperature, species sensitivity, and capture depth to help estimate the odds of a fish dying after being released. It quantifies what was once a vague gut reaction with a scientific decision matrix.
How to Help Fish Survive After Catching Them
That’s where most fish gets killed or spared. While there are several factor that increase the barotrauma risk, the primary driver is depth. When you hoist the fish out of water, the expanding gas in its swim bladder presses against the fish’s internal organs. Most species can absorbs a rapid rise from ten feet to twenty feet; however, they cannot survive the same rise from eighty feet to one hundred twenty feet, at which point the gas pressure against internal organs will be enough to kill them unless something intervenes.
To consider these differences in species sensitivity, the tool assigns weights specific to each species’ anatomy. For example, rockfish and snappers is very anatomically sensitive to such pressures while bass and trout are tougher but can still succumb during warm water or following prolonged fight stressors. This way, otherwise well-meaning anglers do not release vulnerable species too soon based off intuition.
You’re also prone to forget warm water has less oxygen and speeds up a fish’s metabolism, adding yet another stressor. The calculator brings that home with the difference between surface temps vs. Depth temps. Even without bloat, a fish pulled from chilly deep water into blistering surface layers risk thermal stress. Air exposure and fight time only compound that risk. With each second exposed, the fish’s gills is hammered; with each minute you wrestle the fish, its internal energy stores are depleted.
That’s where the calculator comes in, combining those variables into an illustration of stacked-up pressure trauma vs. Handling stress. It makes you realize there isn’t simply one symptom but rather the overall physical load.
Hook location matters more then people admit. Internal bleeding may occur and become visible hours later with a deep or gill hook but not with a clean lip hook. The tool will take that into account when adjusting the estimated death rate. And when the fish bleeds or is sluggish during the release, the priority shifts from speed to care because the output provides a handling stress score that reflects all that combined damage. High score indicates needing time in a recompression cage or livewell. A low score signals that releasing from the side quickly should of be OK. That knowledge makes the difference, saving fish that would have died from delayed mortality or post-release predation.
A recompression cage may be necessary for catching fish at depth, while fish caught in shallow water will typically be released at the surface. You have an option to switch back and forth with the calc to get your different answers. If you compare using a descender vs. Doing a surface release you’ll notice the benefit of having one. In the case of deep water species, it can be significant.
The calculator helps you determine which species and depths matches up with which gear. It eliminates guessing as to what gear to use. The reference grid provides examples of which gear goes with what species and depth profile. It’s a little device that can make a big difference in survival rate. Consider it more of a plan to follow than a definitive answer. Consider oxygen content, tackle used, and how healthy the fish are where you live. Those things can affect the real world different than the moddern model can account for. But at least now you have some sort of starting point.
You have something that will tell you whether to hurry and drop it off or slow down your technique and spend money on the right tackle. Don’t just want to catch ‘em, we want them to keep catching ‘em the following day. Conservation and sport are both important to keeping our fisheries healthy over the long run. Next time you wrestle one out of deep water, consider the variables for a moment and then flip it back over.