Feeder Rod Loading Calculator
Estimate filled feeder mass, dynamic casting load, rod rating use, quiver-tip preload, and line strain for stillwater, river, method, and distance feeder setups.
🎯 Real feeder presets
⚙ Setup inputs
Feeder rod loading result
Calculation breakdown
🛠 Feeder load data grid
📏 Rod rating and quiver tip table
| Rod class | Common length | Cast rating | Comfort load | Typical quiver tips |
|---|---|---|---|---|
| Picker | 9-10 ft / 2.7-3.0 m | 25 g / 0.9 oz | 12-20 g loaded | 0.5-1 oz |
| Light feeder | 10-11 ft / 3.0-3.3 m | 40 g / 1.4 oz | 20-32 g loaded | 0.75-1.5 oz |
| Medium feeder | 11-12 ft / 3.3-3.7 m | 60 g / 2.1 oz | 35-48 g loaded | 1-2 oz |
| Method feeder | 10-12 ft / 3.0-3.7 m | 80 g / 2.8 oz | 45-64 g loaded | 1.5-3 oz |
| Heavy feeder | 12-13 ft / 3.7-4.0 m | 100 g / 3.5 oz | 60-80 g loaded | 2-4 oz |
| Distance feeder | 12-13 ft / 3.7-4.0 m | 120 g / 4.2 oz | 72-96 g loaded | 2-4 oz |
| Barbel feeder | 12-13 ft / 3.7-4.0 m | 150 g / 5.3 oz | 90-120 g loaded | 3-5 oz |
| Estuary feeder | 12-14 ft / 3.7-4.3 m | 180 g / 6.3 oz | 110-145 g loaded | 4-6 oz |
📊 Feeder style coefficients
| Feeder style | Feed retention | Cast stability | Flow drag factor | Best use |
|---|---|---|---|---|
| Open-end cage | 0.92 | 1.04 | 0.95 | Bream, skimmers, steady lake work |
| Blockend maggot | 0.88 | 1.03 | 1.05 | Roach, dace, chub with loose feed |
| Flat method | 1.08 | 1.10 | 0.90 | Carp and tench on commercials |
| Hybrid feeder | 1.02 | 1.07 | 0.92 | Distance casts with compact feed |
| Window feeder | 0.96 | 1.05 | 0.98 | Deep stillwaters and controlled release |
| River bullet | 0.90 | 1.02 | 1.18 | Steady current with less rolling |
| Grip or anchor | 0.94 | 1.08 | 1.35 | Floods, tidal flow, rough bottom |
| Lead bomb | 0.00 | 1.00 | 0.72 | Hookbait only and tight casting |
🎣 Gear and species comparison grid
Roach and skimmers
20-40 gPicker to light feeder, 0.5-1.5 oz tips, 4-6 lb mono, small cages or blockends.
Bream and tench
40-80 gMedium feeder or method rod, 1-3 oz tips, 6-8 lb mono, cage or flat method feeders.
Commercial carp
60-100 gMethod feeder rod, softer tip for liners, 8-10 lb mono, filled flat method loads.
Barbel and tidal flow
100-180 gHeavy or barbel feeder rods, 3-6 oz tips, 10-15 lb mono, bullet or grip feeders.
| Target | Venue type | Typical filled load | Rod match | Line and tip match |
|---|---|---|---|---|
| Canal roach | Slow canal | 18-35 g / 0.6-1.2 oz | Picker or light feeder | 4 lb mono, 0.5-1 oz tip |
| Reservoir bream | Open stillwater | 45-85 g / 1.6-3.0 oz | Medium or distance feeder | 6-8 lb mono, 1.5-3 oz tip |
| Commercial carp | Island chuck | 55-95 g / 1.9-3.4 oz | Method feeder rod | 8 lb mono, 1.5-3 oz tip |
| River chub | Steady glide | 60-110 g / 2.1-3.9 oz | Heavy feeder | 8-10 lb mono, 2-4 oz tip |
| Barbel | Flood river | 110-180 g / 3.9-6.3 oz | Barbel or estuary feeder | 12-15 lb mono, 4-6 oz tip |
| Flatfish | Tidal estuary | 90-160 g / 3.2-5.6 oz | Estuary feeder | 12-15 lb mono, 4-6 oz tip |
💨 Distance and flow adjustment reference
| Condition | Distance or speed | Cast factor | Tip pressure effect | Practical reading |
|---|---|---|---|---|
| Short controlled swim | Under 25 m / 27 yd | 1.05-1.12 | Low if line is sunk | Rod rating can sit near the lower end |
| Normal feeder range | 25-45 m / 27-49 yd | 1.12-1.24 | Moderate line bow | Keep dynamic load under 80% |
| Long range feeder | 45-70 m / 49-77 yd | 1.24-1.40 | Wind and line belly matter | Use shock-safe casts and a firmer blank |
| Fast river | 0.6-1.0 m/s | Distance still applies | Can double tip preload | Grip shape may hold but loads the tip |
| Tidal or flood push | 1.0 m/s plus | Use extra margin | High broadside drag | Shorten range or step up rod class |
💡 Calculation notes
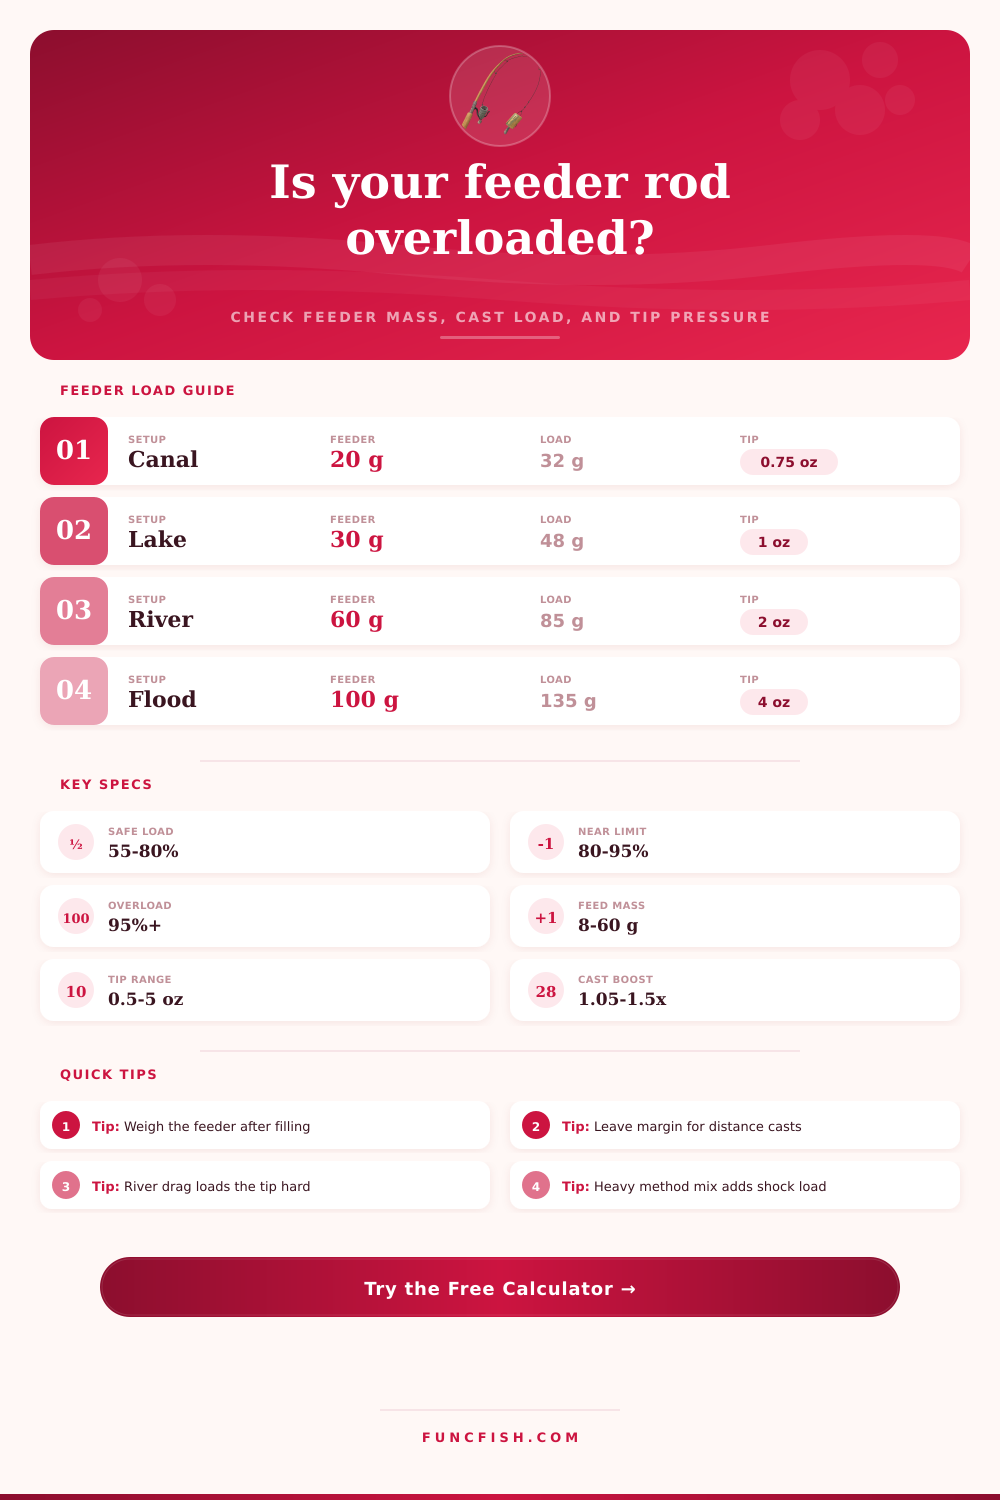
Filled feeder reality: A 40 g feeder with 25 g of damp feed is not a 40 g cast. The calculator applies feeder retention and wet bait factors so the loaded mass reflects what the blank actually accelerates.
Tip load is separate: A rod can cast the feeder safely but still show too much quiver-tip preload in flow. Treat the tip estimate as a bite-registration check, not a casting-weight rating.
All results are estimates for tackle matching and repeat casting comfort. Inspect rod markings, damaged blanks, knots, shock leaders, and venue conditions before increasing feeder weight.
A different kind of frustration comes from breaking a rod on the water for feeder fishermen. Typically it’s because you’ve been casting up current in the breeze and you feel the load go into the line, then “wham” the rod break at the end right as the fish takes hold. It’s almost always at the foregrip. It is a broken hunk of gear. The culprit is often considered to be shoddy build quality or simply bad luck.
In fact, it is easier to prevent and easier to understand than most think. Chances are you have been overloading your rod outside its dynamic range while also forgetting that there is some amount of static weight on your line from the feeder down on the bottom. Simply knowing what rating your paper says won’t do. Understand that rating will tell you what level of stress your rod should endures in actual conditions.
Why Your Feeder Rod Breaks
Once you know how far you are going to be casting and what size feeder is used, the calculator does the rest for you. It will separate the static mass of your set-up from moving forces generated as it go through the swing. You might think that a forty-gram feeder with wet groundbait and a meaty hooklink is okay on a sixty-gram rod but this is not the case. When you consider the effect of a long cast you put more acceleration on the load. Often it’s more than twenty percent over the rod’s rating before you have even pulled the line off the deck.
The mistake so many angler make is only weighing empty feeder. The other factor to manage, which is equally important to casting weight, is how much tip you need or want. So in a river with current, the water pushes against the line and feeder, creating drag that bends the quiver tip. That bend lets you see the bite but also puts constant pressure on the rod blank. And when your line hits the flow at a steeper angle in faster water, it may be feeling three ounces of pressure without a single fish touching it.
A beefier tip can help here, but it must be able to handle that constant pressure before the rod break down. That’s what the tool is estimating for that preload and allowing you to dial in your tip stiffness to match actual water speed. So that you don’t snap tips by trying to force a light setup into conditions it doesn’t fit. You won’t snap off tips doing that.
Weight is only part of the story. Feeder design also influences the style. Maggot feeders are typically blockends that shed some bait on the cast, reducing their effective mass but creating greater drag should they catch in vegetation. Method feeders holds the bait tightly, which provides extra stability. However, their solid structure creates a greater shock load when casting. Open cages strike a compromise on both counts. They feel different under load. The reference tables includes this variability in their coefficient. That means the result from your calculation considers what your tackle does, not just the raw weight.
There should of always be some sort of safety buffer or insurance against material fatigue. Again, carbon fiber weakens over time, especially if it is repeatedly loaded to its maximum capacity. This safety buffer represents a 10-25% added safety factor. It accounts for human error when making a hard cast, a stiffer rod due to cold conditions, and gusty wind. Underloading is better than having an unexpected break. Use the calculator to adjust this safety margin based off your casting conditions and your experience with the rod.
The next time you fish when the bite isn’t great, think about how long it took you to tie back on all of the tips that broke off. Was it due to tactics or did you spend half the time restringing broken tips? If they are loaded properly, each bend in the rod should be due to a fish, not your tackle battling gravity. By respecting the numbers, you’ll be able to throw hard and gain distance without fear of breaking anything down the road. It’s that fine line between power and preservation that sets the consistently good angler apart from those that constantly break their furnitures.
Patience and accuracy are two keys to feeder fishing. Getting a feel for how much you can pull on your rod eliminates the guessing game and allows you to develop a strategy. It takes the worry out of overworking it and allows you to concentrate more on your baiting and presentation. Once the tackle element is removed, it’s all about the fish.
Remember this during each trip. Trust the numbers to build your confidence. This keeps you away from costly trial and error with high-end moddern carbon blanks.