Plastisol Worm Batch Calculator
Estimate plastisol volume, mold pours, pigment drops, salt, glitter, and finished worm count before heating a batch for soft plastic fishing worms.
🎣Batch presets
⚙Batch inputs
Batch estimate
Formula breakdown
🧪Material comparison grid
Slim straight tails use less volume than a full cylinder with the same length and diameter.
Dense stick worms stay close to cylinder volume and usually need extra salt margin.
Soft plastisol is slightly lighter per milliliter and works well for finesse worms.
Salt-loaded mixes weigh more and settle faster in tall heating cups.
Plain batches need a modest reserve for injector hold-up, sprue, and cup residue.
Heavy additive packs trap material in the cup and require more mixing reserve.
Keeping batches near eight fluid ounces makes color notes easier to repeat.
The calculator converts every result through 29.5735 milliliters per fluid ounce.
📋Reference tables
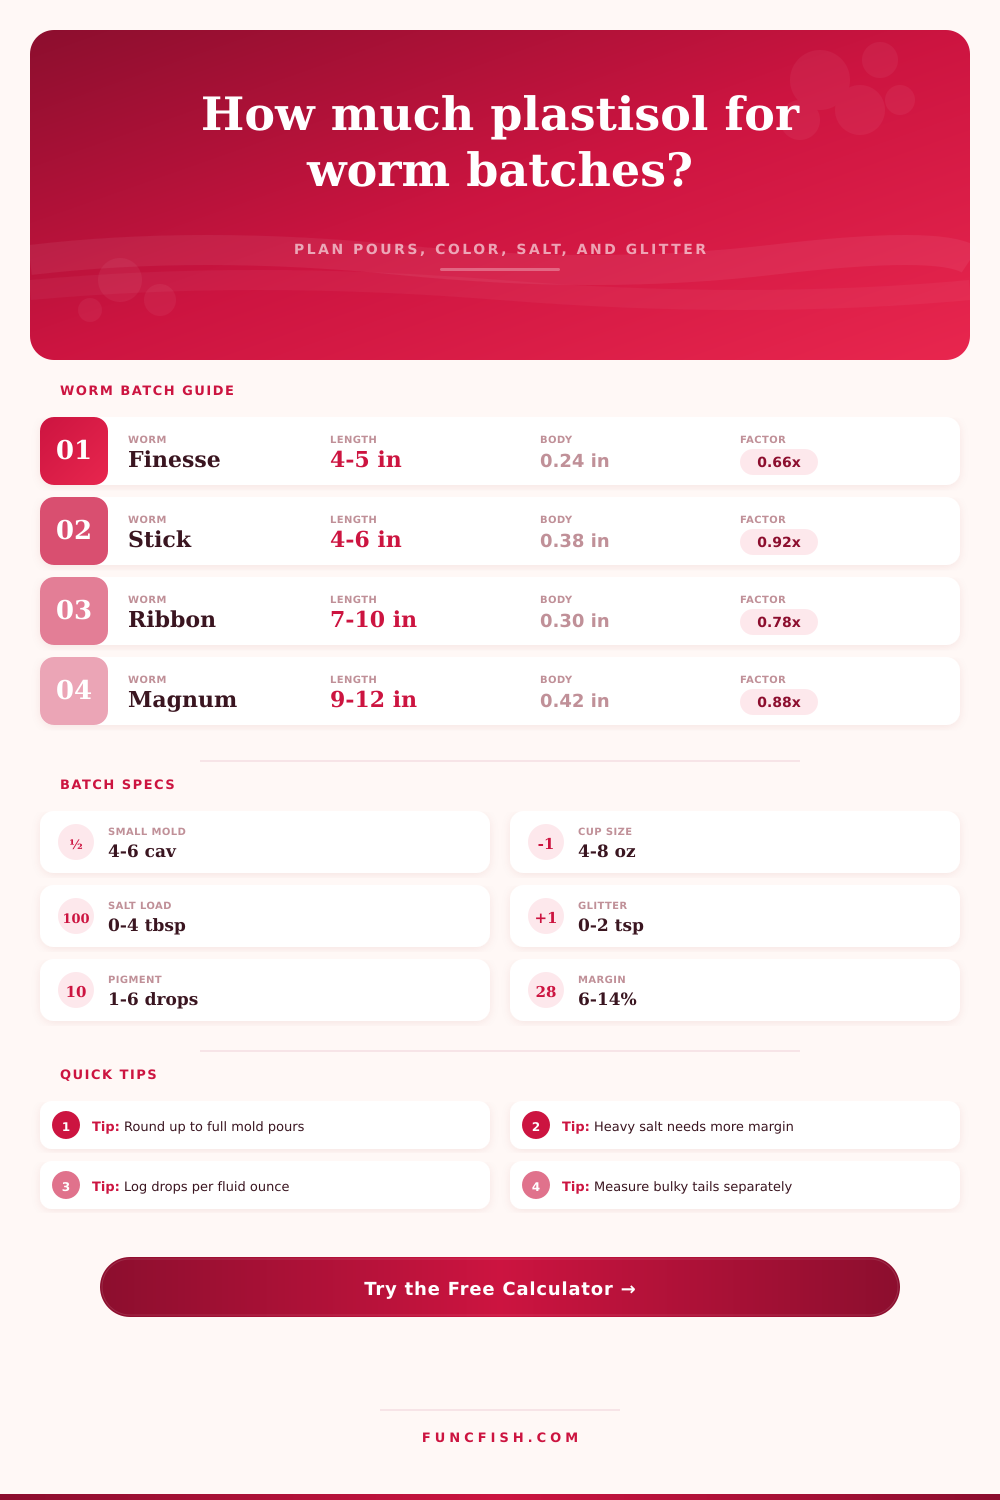
| Worm profile | Typical length | Average body | Volume factor |
|---|---|---|---|
| Finesse straight tail | 4-5 in / 10-13 cm | 0.20-0.26 in / 5-7 mm | 0.66 cylinder |
| Trick worm | 5-7 in / 13-18 cm | 0.24-0.32 in / 6-8 mm | 0.74 cylinder |
| Stick worm | 4-6 in / 10-15 cm | 0.32-0.44 in / 8-11 mm | 0.92 cylinder |
| Ribbon tail worm | 7-10 in / 18-25 cm | 0.26-0.36 in / 7-9 mm | 0.78 cylinder |
| Magnum ribbontail | 9-12 in / 23-30 cm | 0.38-0.50 in / 10-13 mm | 0.88 cylinder |
| Ned worm blank | 2.5-3.5 in / 6-9 cm | 0.30-0.38 in / 8-10 mm | 0.86 cylinder |
| Plastisol blend | Density used | Batch margin | Best worm style |
|---|---|---|---|
| Soft finesse blend | 1.02 g/ml | 6% | Drop shot and shaky worms |
| Medium worm blend | 1.05 g/ml | 7% | General bass worms |
| Firm casting blend | 1.08 g/ml | 8% | Long casts and heavy cover |
| High stretch blend | 1.04 g/ml | 9% | Thin tails and panfish worms |
| Floating blend | 0.96 g/ml | 10% | Floating worms and stand-up rigs |
| Salt ready blend | 1.10 g/ml | 10% | Stick worms and wacky baits |
| Additive pack | Salt dose per 4 fl oz | Glitter per 4 fl oz | Extra margin |
|---|---|---|---|
| Plain clear base | 0 tbsp / 0 ml | 0 tsp / 0 ml | 0% |
| Light glitter | 0 tbsp / 0 ml | 0.4 tsp / 2 ml | 1% |
| Heavy glitter | 0 tbsp / 0 ml | 1.2 tsp / 6 ml | 3% |
| Light salt sink | 1.0 tbsp / 15 ml | 0.3 tsp / 1.5 ml | 5% |
| Heavy salt stick worm | 2.5 tbsp / 37 ml | 0.5 tsp / 2.5 ml | 8% |
| Floating powder | 0 tbsp / 0 ml | 0.2 tsp / 1 ml | 6% |
| Mold setup | Usable worms per pour | Good small batch | Repeat note |
|---|---|---|---|
| Single-cavity prototype | 1 worm | 1-2 fl oz / 30-60 ml | Best for color tests |
| Four-cavity hand pour | 4 worms | 3-5 fl oz / 90-150 ml | Easy for laminate trials |
| Six-cavity injector mold | 6 worms | 4-8 fl oz / 120-235 ml | Common worm batch size |
| Ten-cavity production mold | 10 worms | 8-14 fl oz / 235-415 ml | Track cup fill carefully |
| Two-color laminate mold | Full count split by color | 2 equal half batches | Calculate each side separately |
💡Batch notes
Tip: If a mold has thick sprues or long injector ports, treat the calculator result as the minimum hot material target and keep one extra ounce ready.
Tip: For laminate worms, calculate the full batch first, then split the plastisol and color drops by the same percentage used in the mold.
That’s what every soft plastic maker dreads when the heater dings… The signal that the timer has run out. So you raise the lid and grab the cup… and you see there are still three ounces left in the tank.
It’s plastisol. You’re using a mold with six cavities. Three is filled out beautifully. Three have a thin layer of crust on the bottom where they didn’t get enough. It happens all too often in the worm room.
Plan Your Plastic Mix Easily
Perhaps you overmixed your batch. Maybe you misjudged how much was going into each one. Or maybe you just neglected to factor in amount of salt being used. Your lessons cost you both time and material.
This mistake won’t happen with the batch calculator on this page. Not only does it serve as a reality check; it’s also a volume estimator. It makes you think about the physics of your pour before heating up the material.
The beauty of the tool is it handles the cylinder volume math for you, but you still get the value in knowing what goes into the equation. Knowing what shape profile you’re making matters here. Worms are not a solid cylinder. A finesse straight tail isn’t either. They taper, which is why the calculator include a fill factor to account for that missing volume at the head and tail.
Treating a finesse worm like a stick worm will result in excess plastic. I see many folks doing this because they notice the diameter and assume full density.
One other variable that creates error is the additive pack. Not only does the pack add bulk and weight but it will also change the viscosity of the mix. If you’re loading a batch with a lot of salt, it’s going to be heavier. That means it sets up quicker in the heating cup. Then when you pour it into the molds, the extra weight trap residue in the mold’s ports and sprues.
That’s where the batch margin gets adjusted on the calculator. You might think you only need eight ounces for the number you wanted. However, you may have to use nine or ten if it is a heavy salt, so that final cavity gets filled out completely. And if you don’t take that margin into consideration, you’ll just get frustrated.
Similarly, there is glitter. It is subtler, yet still effective. Chunky glitter catches in the vents of the mold, and fine glitter flows really well. These details are included in the breakdown section of the tool.
You’ll see how much glitter you can use versus base blend and pigment drops. This is a big deal when attempting to duplicate a color code months from now. This is about consistency again. Pouring by sight means that you will never achieve the exact same shade twice. Calculated pouring by volume allow you to make it exactly the same.
I like that the tool has some reference tables built-in. These tell you the approximate margin and density of various blends. For example, the softer the blend the less dense it is. Therefore, to get the same amount of worm, you need more volume in terms of weight. It figures this out for you. So there’s no need to whip out a slide rule.
Simply enter the size of your mold cavity and the number of worms you want to make per pour. The calculator will then return the quantity of complete pours. It even rounds up to whole shots as you can’t really effectively pour half a mold.
There are pre-sets on the page that give you a jump-start based off typical situations. So if you’re molding green pumpkin sticks they figure a moderate level of salt and a medium blend of plastic. The default settings are there and you don’t have to start at zero.
Maybe your mold is a little longer, or maybe a little wider. No problem, you can adjust those. But it’s got the base to start with which is half the battle so you don’t have to look that stuff up.
A great pour starts with preparation. A good pour maker can time his heaters and mix colors well. He can’t manage inventory or plan for production volume as well. That’s where the calculator comes in. It makes a plan out of guesswork.
You know going into the worm room what size cup you want to pour. You’ve logged how many pigment go in it and how much salt goes in. When the timer dings there is no panic.
Just balance batch, full mold and satisfaction. You keep your rhythm, your materials, and your sense of self.