Shotting Pattern Depth Calculator
Build a float shotting layout from swim depth, flow, drift, bait weight, float capacity, line diameter, shot size, and the presentation style you want.
🎯 Real Float Shotting Presets
⚙ Depth, Float, and Shot Inputs
Shotting Pattern Results
Calculation Breakdown
📌 Shot and Pattern Data Grid
📊 Split Shot Weight Reference
| Shot Size | Approx Weight | Best Position | Typical Float Work |
|---|---|---|---|
| No.12 | 0.017 g / 0.0006 oz | Tip trim or final tell-tale | Fine canal pencil, crucian float, shallow rudd |
| No.10 | 0.040 g / 0.0014 oz | Lower dropper or slow fall chain | Roach, skimmers, grayling, clear stillwater |
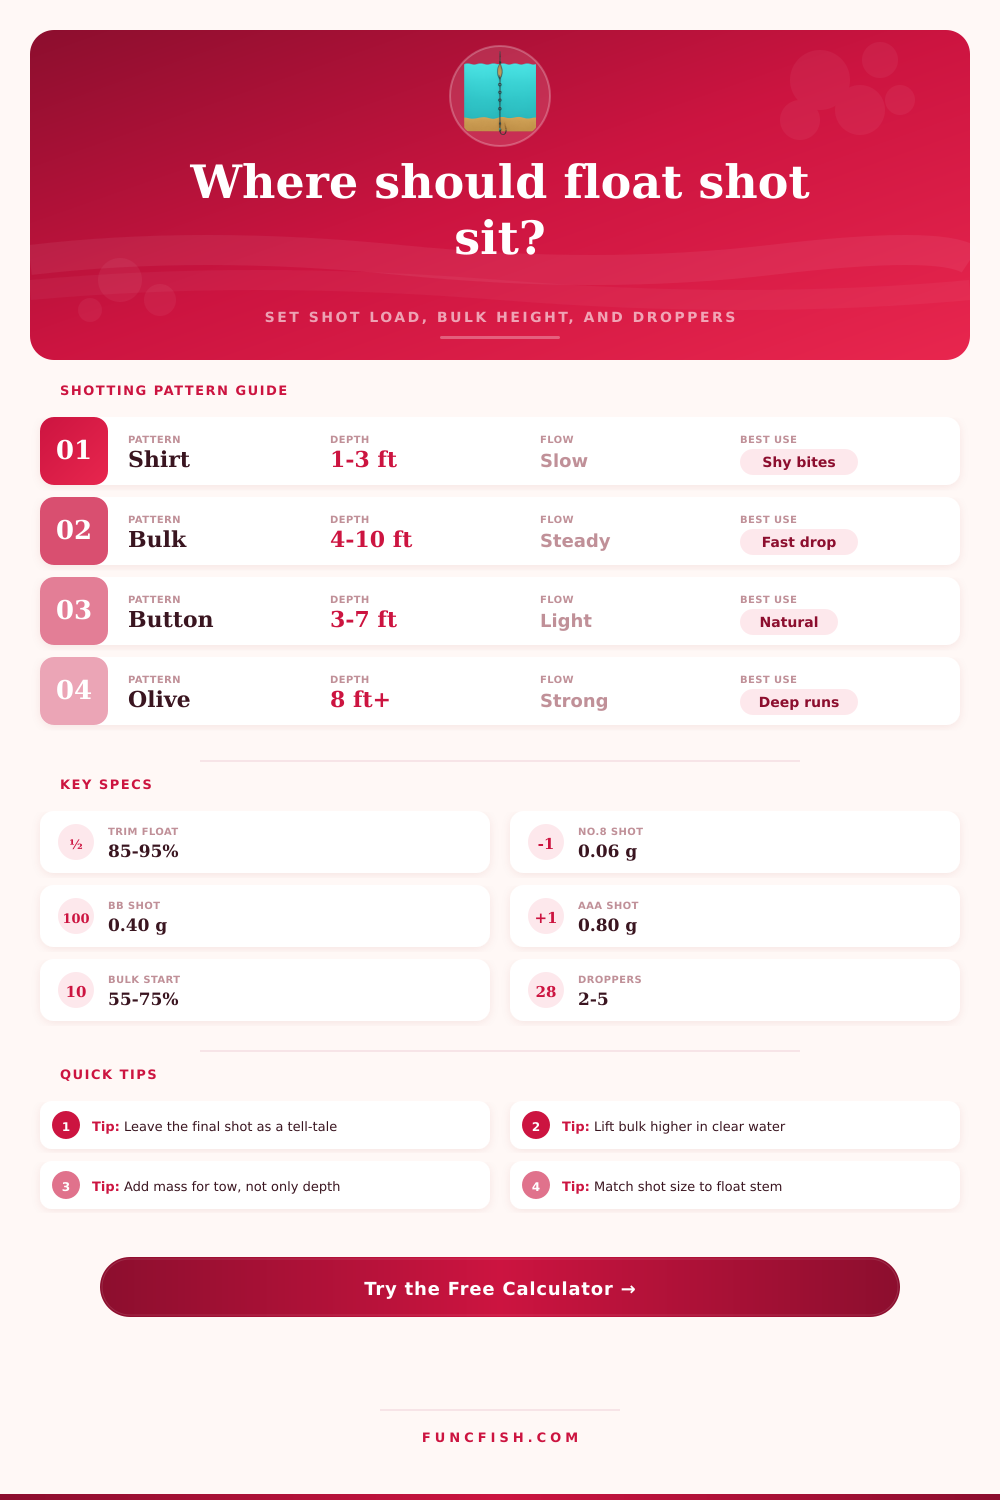
| No.8 | 0.080 g / 0.0028 oz | Dropper, button, or light bulk | Insert waggler, stick float, light tow |
| No.6 | 0.120 g / 0.0042 oz | Upper dropper or small bulk | Tench margin, chub glide, pellet waggler |
| No.4 | 0.200 g / 0.0071 oz | Bulk cluster or locking shot | Avon float, windy lake, deeper waggler |
| BB | 0.400 g / 0.0141 oz | Main bulk or float locking | Medium waggler, river stick, small slider |
| AAA | 0.800 g / 0.0282 oz | Main bulk only | Deep lake, strong tow, big pellet float |
| SSG | 1.600 g / 0.0564 oz | Heavy bulk or slider stop | Predator bung, large Avon, deep slider |
📏 Depth Pattern Reference
| Pattern | Bulk Height Rule | Dropper Count | Use When |
|---|---|---|---|
| Shirt button spread | Even over 70% of depth | 4 to 6 | Natural fall, clear water, wary roach or crucians |
| Bulk plus two droppers | Bulk at 60% depth above hook | 2 | Fast bait delivery with readable lift and sail-away bites |
| Bulk plus three droppers | Bulk at 65% depth above hook | 3 | Deep stillwater, skimmers, bream, steady tow control |
| Olivette with droppers | Olivette at 70% depth above hook | 2 to 3 | Deep slider, consistent drop, or strong mid-water pull |
| Tapered chain | Heavier at top, lighter below | 5 | Holding back in flow while keeping a progressive bait fall |
| Lift pattern | Main shot 3 to 8 in from hook | 1 to 2 | Tench, carp, margin baits, lift bites from bottom feeders |
| Strung out natural fall | No single bulk, spread to hook | 5 to 7 | On-the-drop bites, shallow rudd, slow canal tow |
| Slider stop bulk | Bulk 75% depth above hook | 2 | Deep water where the float must cock after settling |
🐟 Gear and Species Comparison Grid
Roach and Rudd
No.12-No.8Fine bristle floats, 0.10 to 0.14 mm line, and shirt-button or strung-out patterns keep the bait falling naturally.
Tench and Crucian
No.10-No.4Lift or low-bulk rigs suit bottom baits; keep the final shot close enough to show lift bites cleanly.
Chub and Grayling
No.8-BBStick and Avon floats need enough upper bulk to mend and hold back without stalling the hookbait.
Carp and Perch
BB-SSGPellet wagglers, deep sliders, and livebait floats need heavier shot groups and more bristle showing.
📋 Species and Float Matching Table
| Species | Typical Depth | Float Capacity | Shotting Bias |
|---|---|---|---|
| Roach | 2 to 8 ft / 0.6 to 2.4 m | 0.2 to 1.2 g | Fine trim, small droppers, slow final fall |
| Crucian carp | 2 to 5 ft / 0.6 to 1.5 m | 0.15 to 0.8 g | Tip-only trim, lift shot close to hook |
| Tench | 3 to 8 ft / 0.9 to 2.4 m | 0.4 to 1.5 g | Low bulk, lift pattern, positive bottom reading |
| Bream | 5 to 14 ft / 1.5 to 4.3 m | 0.8 to 3.0 g | Bulk three droppers for quick settling |
| Chub | 3 to 9 ft / 0.9 to 2.7 m | 0.8 to 4.0 g | Upper bulk for control and hold-back |
| Grayling | 2 to 6 ft / 0.6 to 1.8 m | 0.4 to 2.0 g | Tapered chain to keep the bait near pace |
| Carp | 2 to 10 ft / 0.6 to 3.0 m | 1.0 to 4.0 g | Stable bristle, heavier droppers, bait support |
| Perch | 4 to 12 ft / 1.2 to 3.7 m | 2.0 to 8.0 g | Heavy bulk, bait support, slower strike delay |
⚖ Current, Depth, and Pattern Adjustment Table
| Condition | Shot Load Allowance | Bulk Position | Practical Check |
|---|---|---|---|
| Dead still, clear water | Use 85% to 90% float capacity | Higher or spread out | Float should cock slowly without burying the tip |
| Light tow or skim | Add 3% to 6% drag allowance | Bulk near 60% depth | Rig should settle before drifting off line |
| Steady river pace | Add 8% to 14% hold allowance | Bulk near 65% depth | Bait should travel slightly slower than surface foam |
| Deep slider water | Add 10% settling allowance | Bulk near 75% depth | Float must cock after the stop hits the top eye |
| Lift bite margin | Keep reserve bristle visible | Lowest shot 3 to 8 in from hook | Float should rise when fish lifts the bait |
| Livebait or large bait | Subtract only supported bait mass | Bulk lower, but not on the hook | Bait must move without dragging the float under |
💡 Shotting Calculation Tips
Float, You have what appears to be the right float on dry ground; however, in the water the bobbing becomes erratick and the line drags across the bottom, or worse, the weight is too light and the bait sits motionless while fish swirl around it without touching down. More often than not, bad tackle isn’t the problem here. In most cases, the wrong amount of weight were used in the wrong place.
Balancing the weight out makes that confusing float a precision instrument for reading below-the-surface action. After establishing your swim conditions, the calculator make it easy without any guessing about the additional drag from your main line.
How to Balance Weight for Fishing
Most anglers use total weight required to set their float like a fixed goal. This fails to account for fluid dynamic. Where does the lead weight sit in relationship to the bait and the current? Both are significant and both will determine placement. A concentrated pattern will be quicker and more controllable on rivers. Still-water wary fish appreciates a longer, slower fall created by a more spread out pattern.
We’ll start trimming the float where we typically do; exposing just the tip. But that results in too many false bites from any sort of subtle disturbance on the surface. A few more bristles will help stabilize the float and account for slight ripples or wind while still allowing you to ignore the distractions and wait until you feel the real deal. To make sure the shot load calculation accounts for this, the calculator simply asks about your preferred trim style. It’s not just going to calculate based on max weight capacity of the float, but what you need to see visually.
Placement is important but so is shot size. Small No. Use No. 10 or even smaller shot. 12 shots will fine tune depth for those last few inches, making it slow drift without kicking up silt off bottom. But going too small means using a lot of shot to get sufficient weight, slowing the presentation and creating drag. On the other hand larger shots such as AAAs or BBS has less surface area on the line, cutting cleaner through the water.
The chart also shows weights so you can easily find the right lead size based off both your depth and your desired swim speed, as shown in the reference table. The rig also responds to water flow. On a steady river current, enough weight above the bait must counteract its surface drift and keep it longer in the feeding lane. Too little bulk and the rig won’t sink down into the fishs zone, but ride up over them. Too much and the bait goes too fast for reluctant carp or tench who takes a tentative bite before they settle down.
In deep stillwater, you don’t want such a concentrated bulk dropping too quickly, missing tentative bites taken by cautious carp or tench before they settle. You want the shot spread out with the bait falling gently as if it were naturaly food. Remember: The hookbait’s weight also matters. A heavy, dense pellet or big worm will trim the float lower because it sinks. If you do not do this, the rig would of hang deeper than desired. This can bury your tip and kill bite indication.
This is information that helps with finding the rig’s actual neutral point in the water column. There is a balance between naturalness and control. The tension lies in perfect shotting. Too little weight, and you can’t present accurately; too much and you’re either masking subtle take-ups or spooking fish. Your goal is a rig that flows with the water, not against it.
Once you start thinking of lead placement as something that can change rather than a fixed setup, silent swims turns into confident bites. That mental switch makes the difference between catching fish consistently and just participating.