Tandem Rig Hook Spacing Calculator
Estimate eye-to-eye hook spacing, rear hook landing point, snell cut length, and strike coverage for live bait stingers, tandem flies, mooching rigs, bucktails, umbrella teasers, and soft-plastic trailers.
📌Tandem rig presets
⚙Rig spacing inputs
Measure from the bait nose, fly eye, lure line tie, or first hook eye position.
Use this for snell tags, haywire twists, loop knots, sleeves, or fly trailer wraps.
Tandem hook spacing forecast
Calculation breakdown
📊Hook geometry quick cards
Size 2 bait hook
1/0 octopus
4/0 live bait
2/0 treble
📏Bait length spacing reference
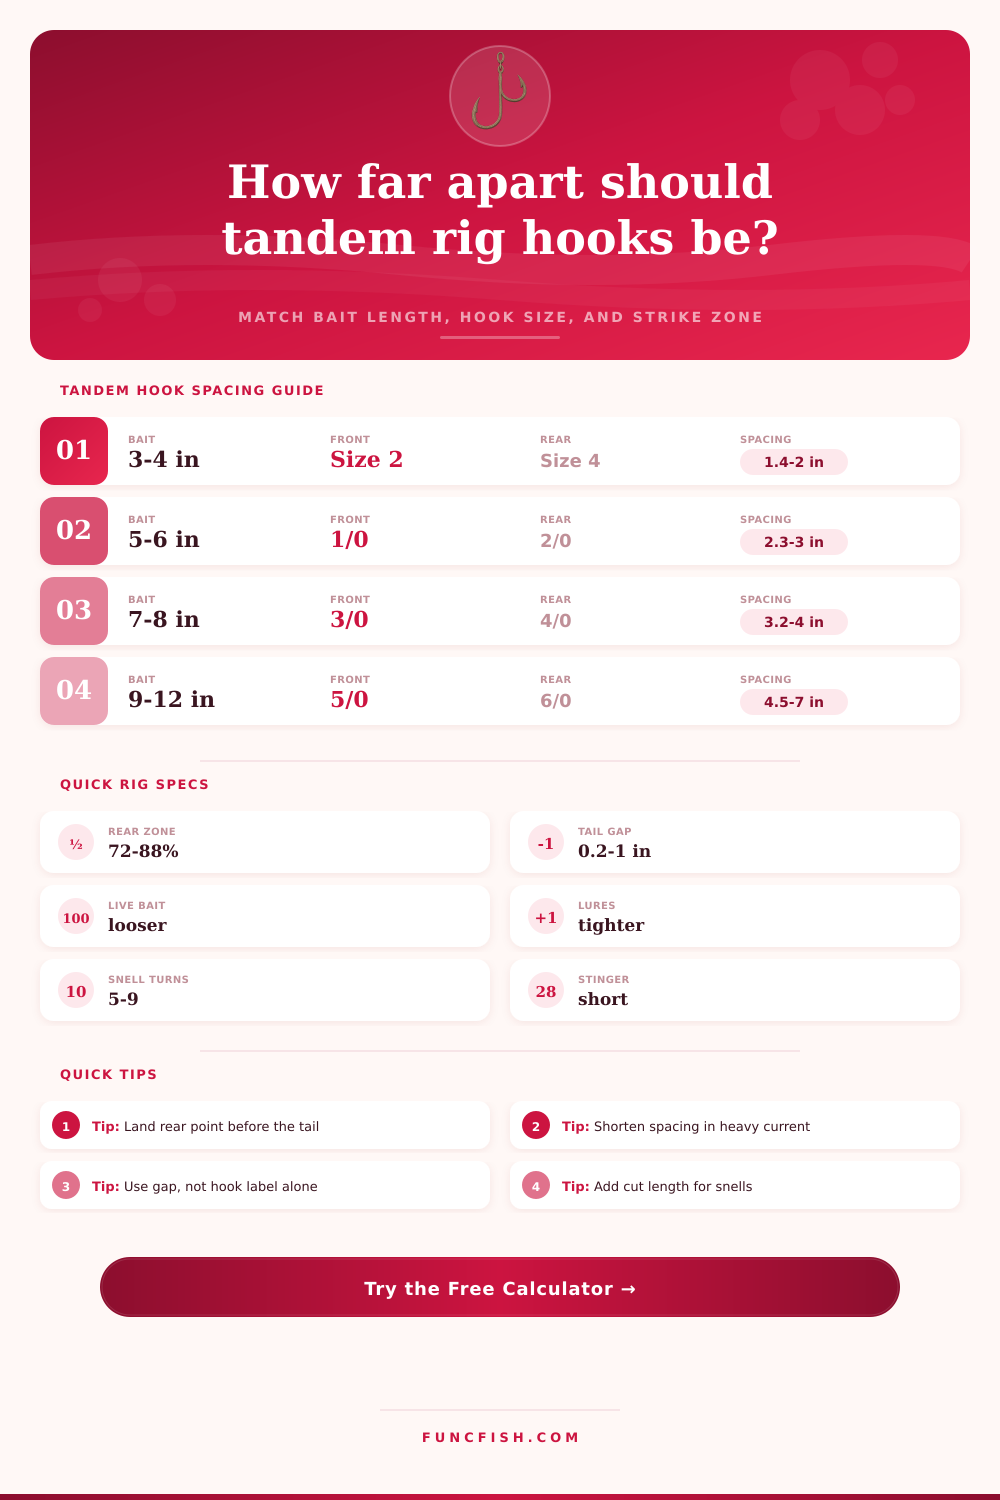
| Bait or lure length | Common front hook | Common rear hook | Rear point zone | Typical eye spacing |
|---|---|---|---|---|
| 2.5-3.5 in / 6-9 cm | Size 8 to 6 | Size 8 to 6 | 70-82% from nose | 0.9-1.6 in / 2.3-4.1 cm |
| 4-5 in / 10-13 cm | Size 4 to 1 | Size 6 to 2 | 72-85% from nose | 1.6-2.5 in / 4.1-6.4 cm |
| 5.5-7 in / 14-18 cm | 1/0 to 3/0 | 1/0 to 4/0 | 74-87% from nose | 2.4-3.8 in / 6.1-9.7 cm |
| 7.5-9 in / 19-23 cm | 3/0 to 5/0 | 3/0 to 6/0 | 76-88% from nose | 3.4-5.0 in / 8.6-12.7 cm |
| 10-12 in / 25-30 cm | 5/0 to 7/0 | 4/0 to treble | 78-90% from nose | 4.8-7.0 in / 12.2-17.8 cm |
🧵Tandem rig style table
| Rig style | Front hook position | Rear hook goal | Spacing adjustment | Best measured point |
|---|---|---|---|---|
| Live bait stinger | Nostril, bridle, or shoulder | Point before caudal wrist | Longer, flexible | Hook eye to hook eye |
| Mooching snell | Nose or upper jaw hook | Rear hook near lateral line tail | Moderate, aligned | Snell wrap exit to eye |
| Crawler harness | Head of crawler | Rear third of bait | Shorter in current | Eye to eye on harness |
| Tandem streamer | Main shank or tube | Trailer at feather tail | Short anti-foul | Rear eye to trailer eye |
| Quick-strike rig | Head or dorsal anchor | Second hook near tail half | Wide and firm | Hook point landing marks |
| Soft-plastic trailer | Jig hook bend or eye | Trailer point in tail kick zone | Tight, low slack | Jig bend to trailer eye |
🐟Species and gear comparison grid
| Species group | Typical bait length | Hook pairing | Leader choice | Spacing emphasis |
|---|---|---|---|---|
| Kingfish, mackerel, wahoo | 5-10 in / 13-25 cm | 2/0-6/0 single plus stinger | Wire or cable | Tail short-strike coverage |
| Salmon and steelhead | 4-7 in / 10-18 cm | 1/0-4/0 octopus pair | Mono or fluorocarbon | Straight bait roll |
| Walleye and sauger | 3-6 in / 8-15 cm | Size 6 to 2 tandem | Mono snell | Rear third of crawler |
| Striped bass and bluefish | 6-12 in / 15-30 cm | 3/0-7/0 plus trailer | Fluoro or wire bite | Eel and bunker tails |
| Musky and pike | 8-14 in / 20-36 cm | Large single or treble pair | Coated cable | Quick-set hook placement |
| Trout and panfish | 2-4 in / 5-10 cm | Size 10 to 6 tandem | Tippet or light mono | Short low-foul spacing |
⚓Leader material spacing effects
| Material | Stretch or stiffness | Cut allowance effect | Spacing caution | Use case |
|---|---|---|---|---|
| Light monofilament | High stretch, soft | Add small wrap margin | Can sag on slack drifts | Crawlers, small baitfish |
| Fluorocarbon | Moderate stiff | Allow for tight knots | May kick rear hook outward | Salmon, stripers, clear water |
| Single-strand wire | Very stiff | Haywire twists use length | Overlong spacing fouls less but swims stiff | Toothy bait stingers |
| Seven-strand wire | Flexible wire | Crimps or twists add bulk | Watch tail loop diameter | Kingfish and mackerel |
| Braided assist cord | Limp and strong | Serving can shorten finished length | Long trailers wrap easily | Jigs and soft plastics |
| Fly tippet | Fine and supple | Thread wraps need tag room | Trailer too far back twists | Tandem streamers |
💡Spacing notes
Measure finished spacing under light tension. Mono, fluoro, braid, and wire sit differently after wraps or twists. Pull the rig straight, mark the rear hook point on the bait, and compare it to the calculated landing zone.
Use the rear point, not only the rear hook eye. Two hooks with the same label can have different shank lengths and point projections. If the point lands past the tail, reduce eye spacing or choose a shorter rear hook.
Poor hook spacing is hallmark of pulling up nothing but tangles of line and a mangled bait. Having a tandem rig give you double the chances of getting bit, but when the spacing isn’t right, it creates a bunch of interference between two hooks. So make the hooks spread apart enough to protect the weak spots of the bait, but not too far apart where they’ll collide on a hard run or cast. It’s all about geometry, not guess work.
This is what that look like on this page as a tool to convert your specific variables into actual distances. Knowing how all those figure apply makes you a more effective angler.
How to Space Your Hooks
Each fish has its own personality as an attacker. Sometimes it rips the bait off the nose like a kingfish does. Other times it strike near the tail like a striped bass does. You have to cover for both scenario at the same time. Space the hooks too far apart and the back one will float out behind the bait beyond reach of teeth. Crowd them up too tight and they’ll clash on every cast or ball up in current. The calculator help find that narrow window where coverage meets clarity.
A rigid lure won’t move around as a live bait will. As the shad swims, its body will flex up and down. This create an arch in the swim pattern, which effectively shortens length of your presentation. A soft plastic paddle tail flutters in wide arches, whereas a bucktail jig trail relatively straight behind a weight. The reason to enter the bait bend percentage is this setting take into account natural arc or sag your bait creates in the water. So you’re sure the rear hook falls in the right strike zone rather than riding out of position based off water flow reasons.
Physical characteristics of how a bait behave under tension are very different between a live and dead bait. You don’t want to fish a six inch live bait the same as a six inch dead bait. The final spacing is where the leader material play an important role. Once wet, fluorocarbon stays pretty true to the eye-to-eye measurement you make prior to fishing. It’s stiff and does not stretch much under load. Conversely monofilament will stretch considerable both while under load (pulling hooks closer together during a fight) and under no load (slackening hooks out while drifting). Wire adds some stiffness to prevent action of the hook but also keeps them locked down in position more rigidly. These allowances is taken into account by the calculator so you won’t wind up with a perfect looking rig on the table only to find it doesn’t work right on the bottom.
More anglers pay too little attention to point placement and far too much emphasis on hook size. Even two hooks with the same labeled size can has different shank lengths, which changes where the barb sits in relation to the eye. These reference tables is simply starting points. Real-world conditions will require tweaks, such as tighter spacing in heavy current to prevent spinning out of place. You may also need wider gaps in clear water when you don’t want tangling hardware to scare wary fish.
It’s as simple as being efficient. Minimize foul risk while increasing strike coverage. These equations takes the guesswork out of rig construction. Running your particular bait, leader, and species through this process eliminates the headache of trial-and-error. Tuning these variables in about ten minutes before hitting the water can potentially save you an hour on the dock unraveling knots.
You don’t want the back hook landing where the fish struck, but rather where they drift after hitting the bait. Match the math to the move and the bites will come.