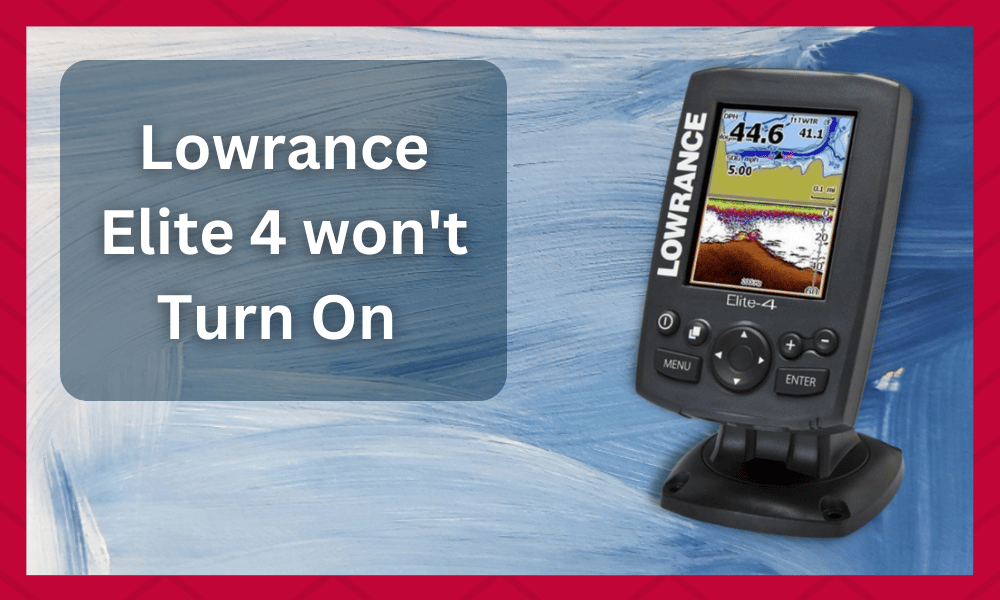
The Lowrance Elite 4 is a compact unit that can easily be installed on smaller boats. With this unit, you don’t have to worry about maximizing fishing efficiency. You can find good fishing spots quite easily without putting in much effort.
With that said, the best thing about this unit is the affordable pierce point. So, purchasing this unit shouldn’t be an issue, even if you’re on a limited budget.
This unit is known for its reliability, but many users have recently said that their Lowrance Elite 4 won’t turn on. So, let’s cover a few troubleshooting steps for this problem.
Lowrance Elite 4 won’t Turn On
- Check Power Supply
If you’re struggling with the unit not turning on, start by checking the power output from the battery unit. You should also thoroughly inspect the Lowrance unit on your boat for possible damages. You must take the device to a repair center if the device is damaged.
On the other hand, if the device is in perfect shape, the issue is likely related to the power supply unit. You must check the power supply output to decide whether you need a new battery.
Connect the battery’s terminals with the multimeter to check the power supply. Now, you just have to check the reading on your unit to isolate the problem.
If the power supply is consistently above 12 volts, then there is no need to replace the battery.
![]()
However, if the power flow is irregular and below 12 volts, you must buy a battery replacement. The unit won’t start as long as you don’t provide it with a sufficient power supply. So, get a new battery pack and use the Lowrance Elite 4.
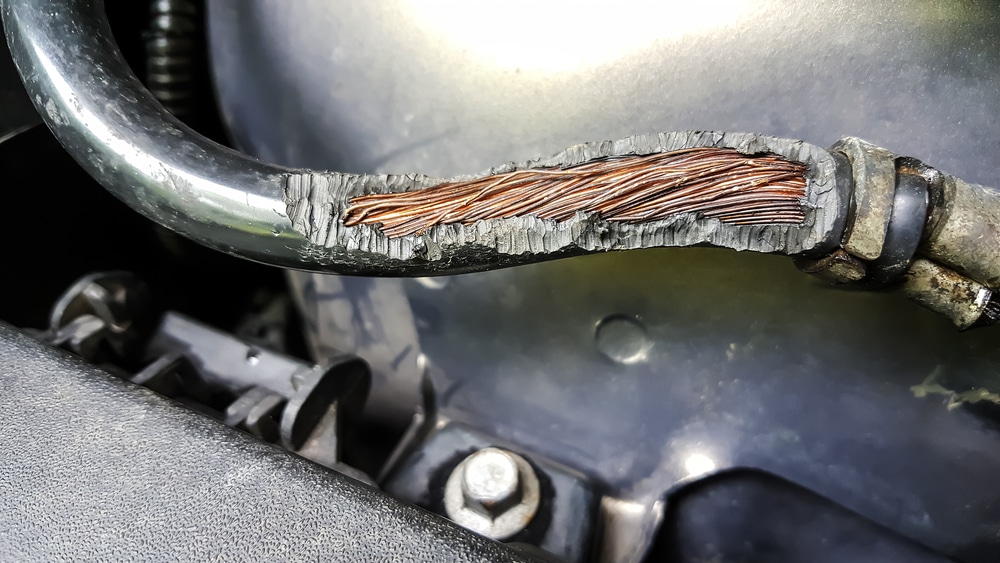
- Faulty Wiring
If your Lowrance Elite 4 won’t turn on, it could signify something wrong with the wiring. To check for this, ensure that all the connections are secure and free of corrosion.
You should check the wiring and make sure that everything is properly connected. If anything is loose or disconnected, it could be the reason why your Lowrance Elite 4 won’t turn on.
Ensure that the power source is working properly and that enough power is going to the device. To check that consider the following:
– If you’re using a battery, check that it is charged and properly connected.
– If you’re using an AC adapter, ensure that it is properly plugged into a functional outlet.
– If you’re using a car charger, ensure that the cigarette lighter is working and that the charger is properly plugged in.
If everything looks okay, you can use a multimeter to test the continuity of the wires.
How to test the power supply?
If you’ve ruled out the battery and wiring as the cause of your Lowrance Elite 4 not turning on, then the next thing you should check is the power supply.
To do this, you can use a multimeter to test the voltage of the power supply. If it is below 12 volts, the power supply is not working properly and needs to be replaced.
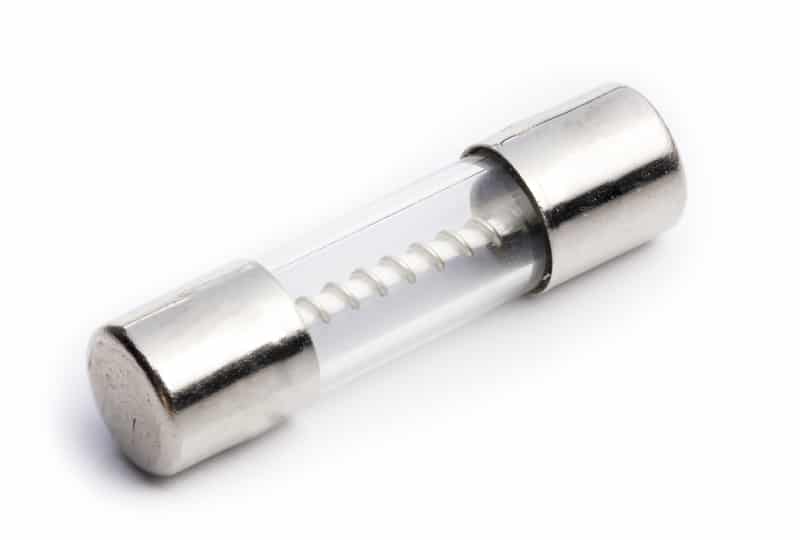
How to test the fuse?
If you’ve ruled out the battery, wiring, and power supply as the cause of your Lowrance Elite 4 not turning on, then the next thing you should check is the fuse. To do this, you can use a multimeter to test the continuity of the fuse.
How to test the switches?
If you’ve ruled out the battery, wiring, power supply, and fuse as the cause of your Lowrance Elite 4 not turning on, then the next thing you should check is the switches.
- Fix Cables & Connection Points
Even if the battery unit is in perfect condition, you will need to check the integrity of your unit’s wiring. In rough water conditions, it is not rare to see damage to the wiring.
It would help if you inspected all the cables going into the unit to identify the error.
If any cable is slightly damaged or broken, you must replace it immediately. Luckily, a replacement cable is quite affordable, and you can easily implement this troubleshooting step.
Along with the wiring and cables, you will have to manage the connection points on your unit. If the connection points on your unit are dirty or corroded, then that is likely why you cannot get the Lowrance Elite 4 unit working.
It would help if you tried diluting vinegar on the connection points to fix this problem. This solution will help you take care of the rust issue. Once all the dirt and corrosion are off the system, try firmly connecting cables to the connection points.
Hopefully, it will start working without further issues.
- Replace Defective Unit
If none of the troubleshooting methods mentioned above apply to your case, there is a good chance that your unit is defective. You might struggle with various issues, from faulty buttons to broken panels.
So, the best option here would be to call your dealer and ask for a replacement.
If your warranty is still valid, you won’t have to spend a penny on the replacement. Avoid opening up the device yourself and ask the dealer for a replacement.
If the warranty on your unit has expired, then reaching out to customer support is also a viable option. The Lowrance customer support is quite responsive and helps customers overcome any issue affecting the user experience.
Call their company number or send them an email about your issue. Lowrance customer support will connect you to a professional, and you can follow his instructions to get the device working again.

These troubleshooting methods should help you overcome the starting issue with the Lowrance Elite 4. Most of the time, the issue goes away after you manage the power supply issues.
So, there is a good chance you won’t have to bother with any other solutions for your Lowrance unit.
- Reset the device
You can try resetting the device if the wiring and connection are good. This will sometimes fix the issue and get things working again. To reset your Lowrance Elite 4, do the following:
– Disconnect the power source.
– Remove the batteries (if applicable).
– Press and hold the power button for 30 seconds.
– Reconnect the power source.
– Turn on the device.
More than usual, simply restarting the device can help fix various issues.
6. Update the software
Another thing you can try is updating the software. There might be a new update that fixes whatever issue you’re having. To update the software, do the following:

– Connect the device to your computer via USB.
– Download and install the latest software update from Lowrance’s website.
– Follow the prompts to update the software.
At times simply updating the software tends to fix the issue.
- Factory reset
If the above-mentioned steps work, you can try a factory reset. Before taking this big step, you should back up your data first. This will reset the device to its default settings. To factory reset your Lowrance Elite 4, do the following:
– Disconnect the power source.
– Remove the batteries (if applicable).
– Press and hold the power button for 30 seconds.
– While still holding the power button, connect the power source.
– Keep holding the power button for 30 more seconds.
– The device will reset and restart.
8. Get in touch with Lowrance.
If none of those steps failed to help solve the issue and didn’t work, your device might have a hardware issue. In this case, you’ll need to get in touch with Lowrance and have them look at it. They might be able to repair it or replace it if necessary.
- Check Button Cable
It is advisable to check if your Lowrance Elite 4 won’t turn on the button cable. The button cable allows the power button to connect to the main board. If this cable is not connected properly, it will prevent the power button from working.
Begin with removing the power button from the front of the unit to check the button cable. Then, use a multimeter to check for continuity between the two pins on the button cable. The button cable is most likely the issue if there is no continuity.
10. Replace Main Board
If the button cable is not the issue, then it’s likely that the main board is defective. The main board is what controls all of the unit’s functions. If it’s defective, then it’s likely that the unit will not turn on.
To replace the main board, you’ll need to open up the unit and remove the old main board. Then, install a new main board in its place. Be sure to use the same type of main board as the one that came with your unit.